Why, Hello There!

It’s now October 17th and I’m sure many (probably all) of you are wondering when the tiny house tour is going to happen. 

Well….now! 

Let’s start out downstairs.


Right when you walk in, you are in our kitchen. Beautiful blue green cabinets, farmhouse sink, white subway tile. 

It’s so full of light.


Plumbing is still in the works, but soon we will have running water.


My range may only be 21 inches, but it has 4 burners, a broiler and an oven that I can fit a full size roasting pan in. 

That means I can roast a whole turkey!


Pretty spacious, huh?

Our bathroom boasts a shower, sink and toilet, with plenty of room for storage. 


Our toilet cabinet also has a pull out step for little ones.


I’ll be writing about how we use our composting toilet in a future post.


Our living room.


Wren’s handy little fold down desk that utilizes the fender cover as a bench.


Plenty of storage in our stairs! The bottom step makes a nice seat too. I’ll have to sew a cushion for it soon.


Wren’s room has a custom Murphy bed built by her great grandpa and her daddy.


I sewed her some custom (kitty!) sheets to fit her bed. 


When her bed is up, she has plenty of room to read and play.


On the way upstairs, you can see my bookshelf. 

It was a great way to use some empty space!


Opposite the master loft and above Wren’s room is our guest loft.


A king size bed fits upstairs! 

Justin also custom made our sconces using mason jars and a metal punch. 


We can also fit Willie’s bed at the foot of ours. 

We need to find some baskets to put our clothes in, otherwise the cats use our clothes as a comfy bed. Can you spot Tikka?

There you go! What do you think? Any questions? 

We still have plumbing for the sinks to run, propane to install for the range and some shelves to install in the kitchen but a huge change since you last saw it!

Stay tuned!

Tick, Tock, Tick, Tock

A month ago, while the tiny house was still studs and insulation, we started the process of building our kitchen cabinets.

Originally, we were going to use a local cabinet company, but soon after getting their price quote, J’s grandpa Bud came to us and asked us if we would like him to build them. 

Of course we said yes!

Knowing that a loved member of the family wanted to take time out of their day to help us reach our dream tiny house always means the world to us.

Plus we could customize them to our hearts content! 


For the cabinets under the kitchen window, we opted for drawers rather than doors. Drawers were just more preferable to us over doors because I hate digging through items in the front to not even find what I was looking for in the back.


Our kitchen layout has our oven next to the front door, so we wanted a cabinet next to the stove to use as a prep counter/dining area, so the peninsula was created. This is also where pots and pans will be stored.


J and Bud had fun designing the stair case. As any tiny house dweller knows, storage is key, so they crafted the tiny house stairs with maximum storage capability. 


W is already trying out her hidie-hole options.


Cabinets with the face frame and drawer inserts are coming along nicely!


Once built, it was time to install them. J decided to paint them with the spray rig after they were installed.


Before painting, we had to decide on a color. We didn’t want the house to feel too dark and cramped, especially in a tiny house, so we opted for a light, bright and cheery color. 


Walls were draped in plastic and masking tape was applied. 

First, J applied the primer coat. 

Then it was ready for the color.

Are you ready?


Bam!

Told you it was light, bright and cheery.


With all the plastic and tape taken down, it looks a million times better. 


The color goes so well with the burnt pine that whenever I step foot into the tiny house, I can’t help but smile. 


All the drawer faces were put on next. It definitely makes the space feel more like a kitchen.


As for the peninsula, Bud had an old piece of butcher block lying around, so they cut it to the size we wanted, sanded the heck out of it and then screwed it on. 

So amazing. 

Our completion end goal date is October 1st and since J and I are getting so close to the end, we decided that we want to keep the final reveal a surprise. 

Please stay tuned for all the final details!

We can’t wait to show you!

Fire! 

Well, a controlled fire really. But before we get to that, I get to talk about pine, lots and lots of pine. 

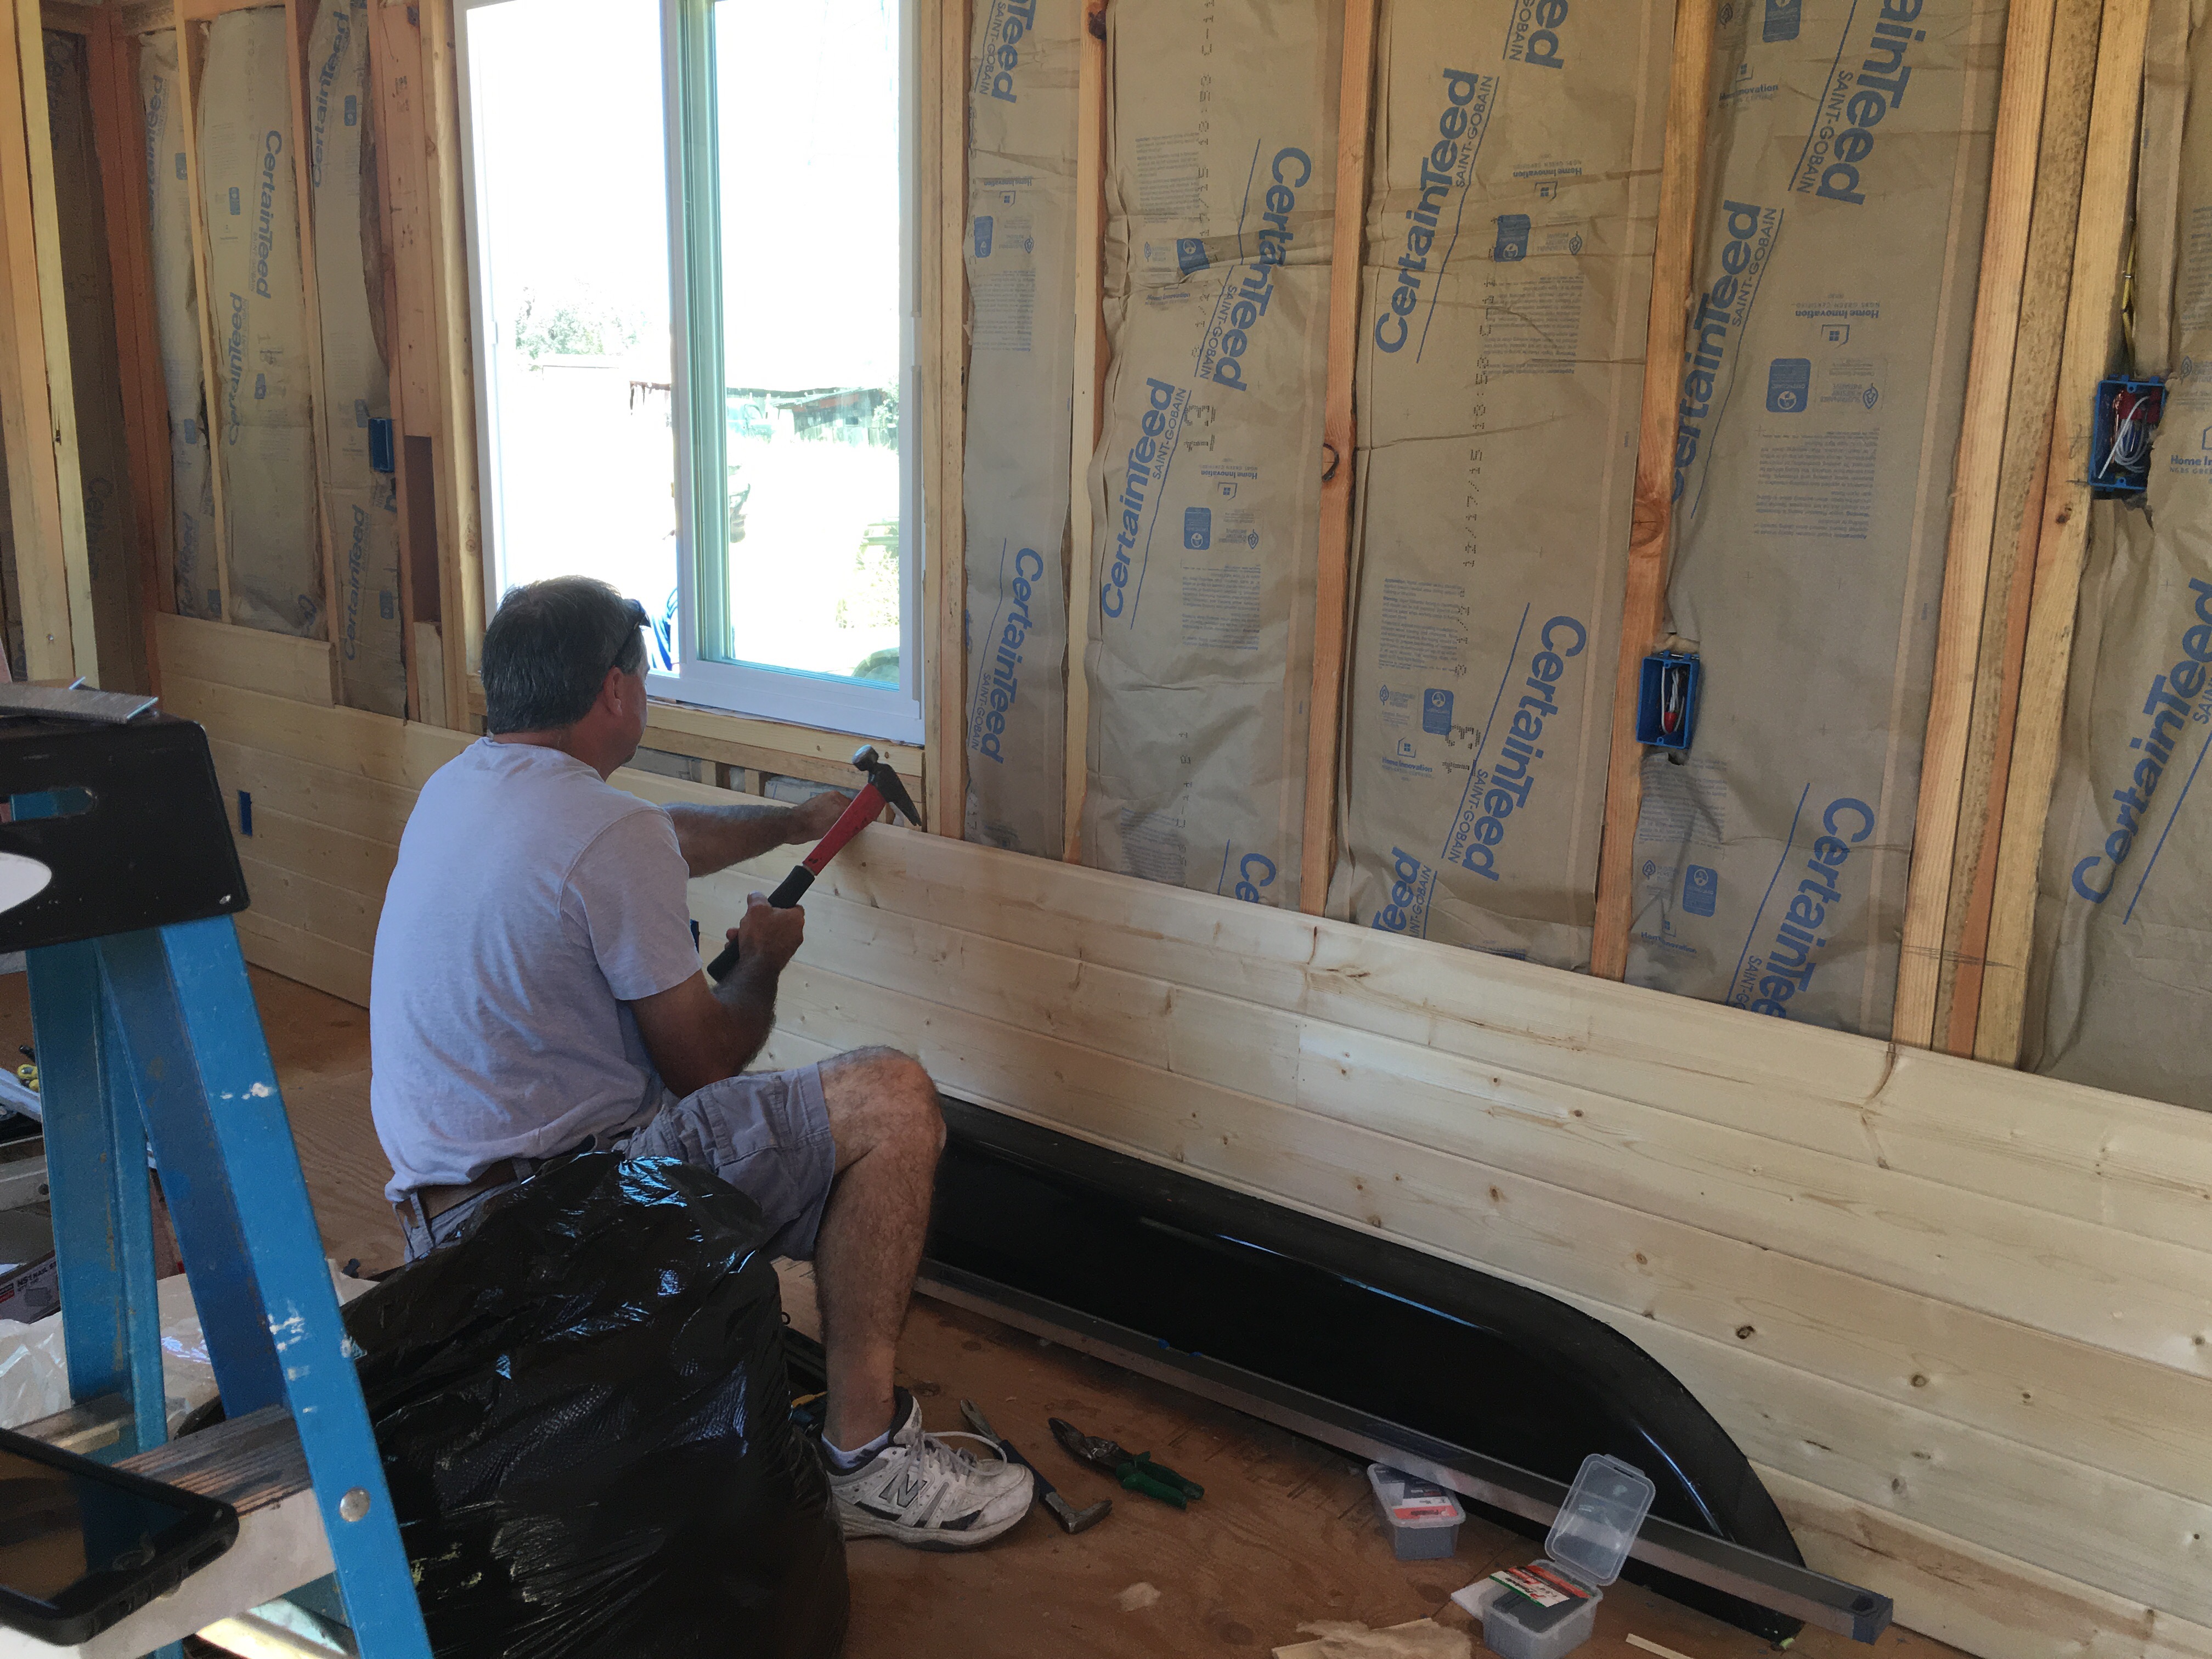
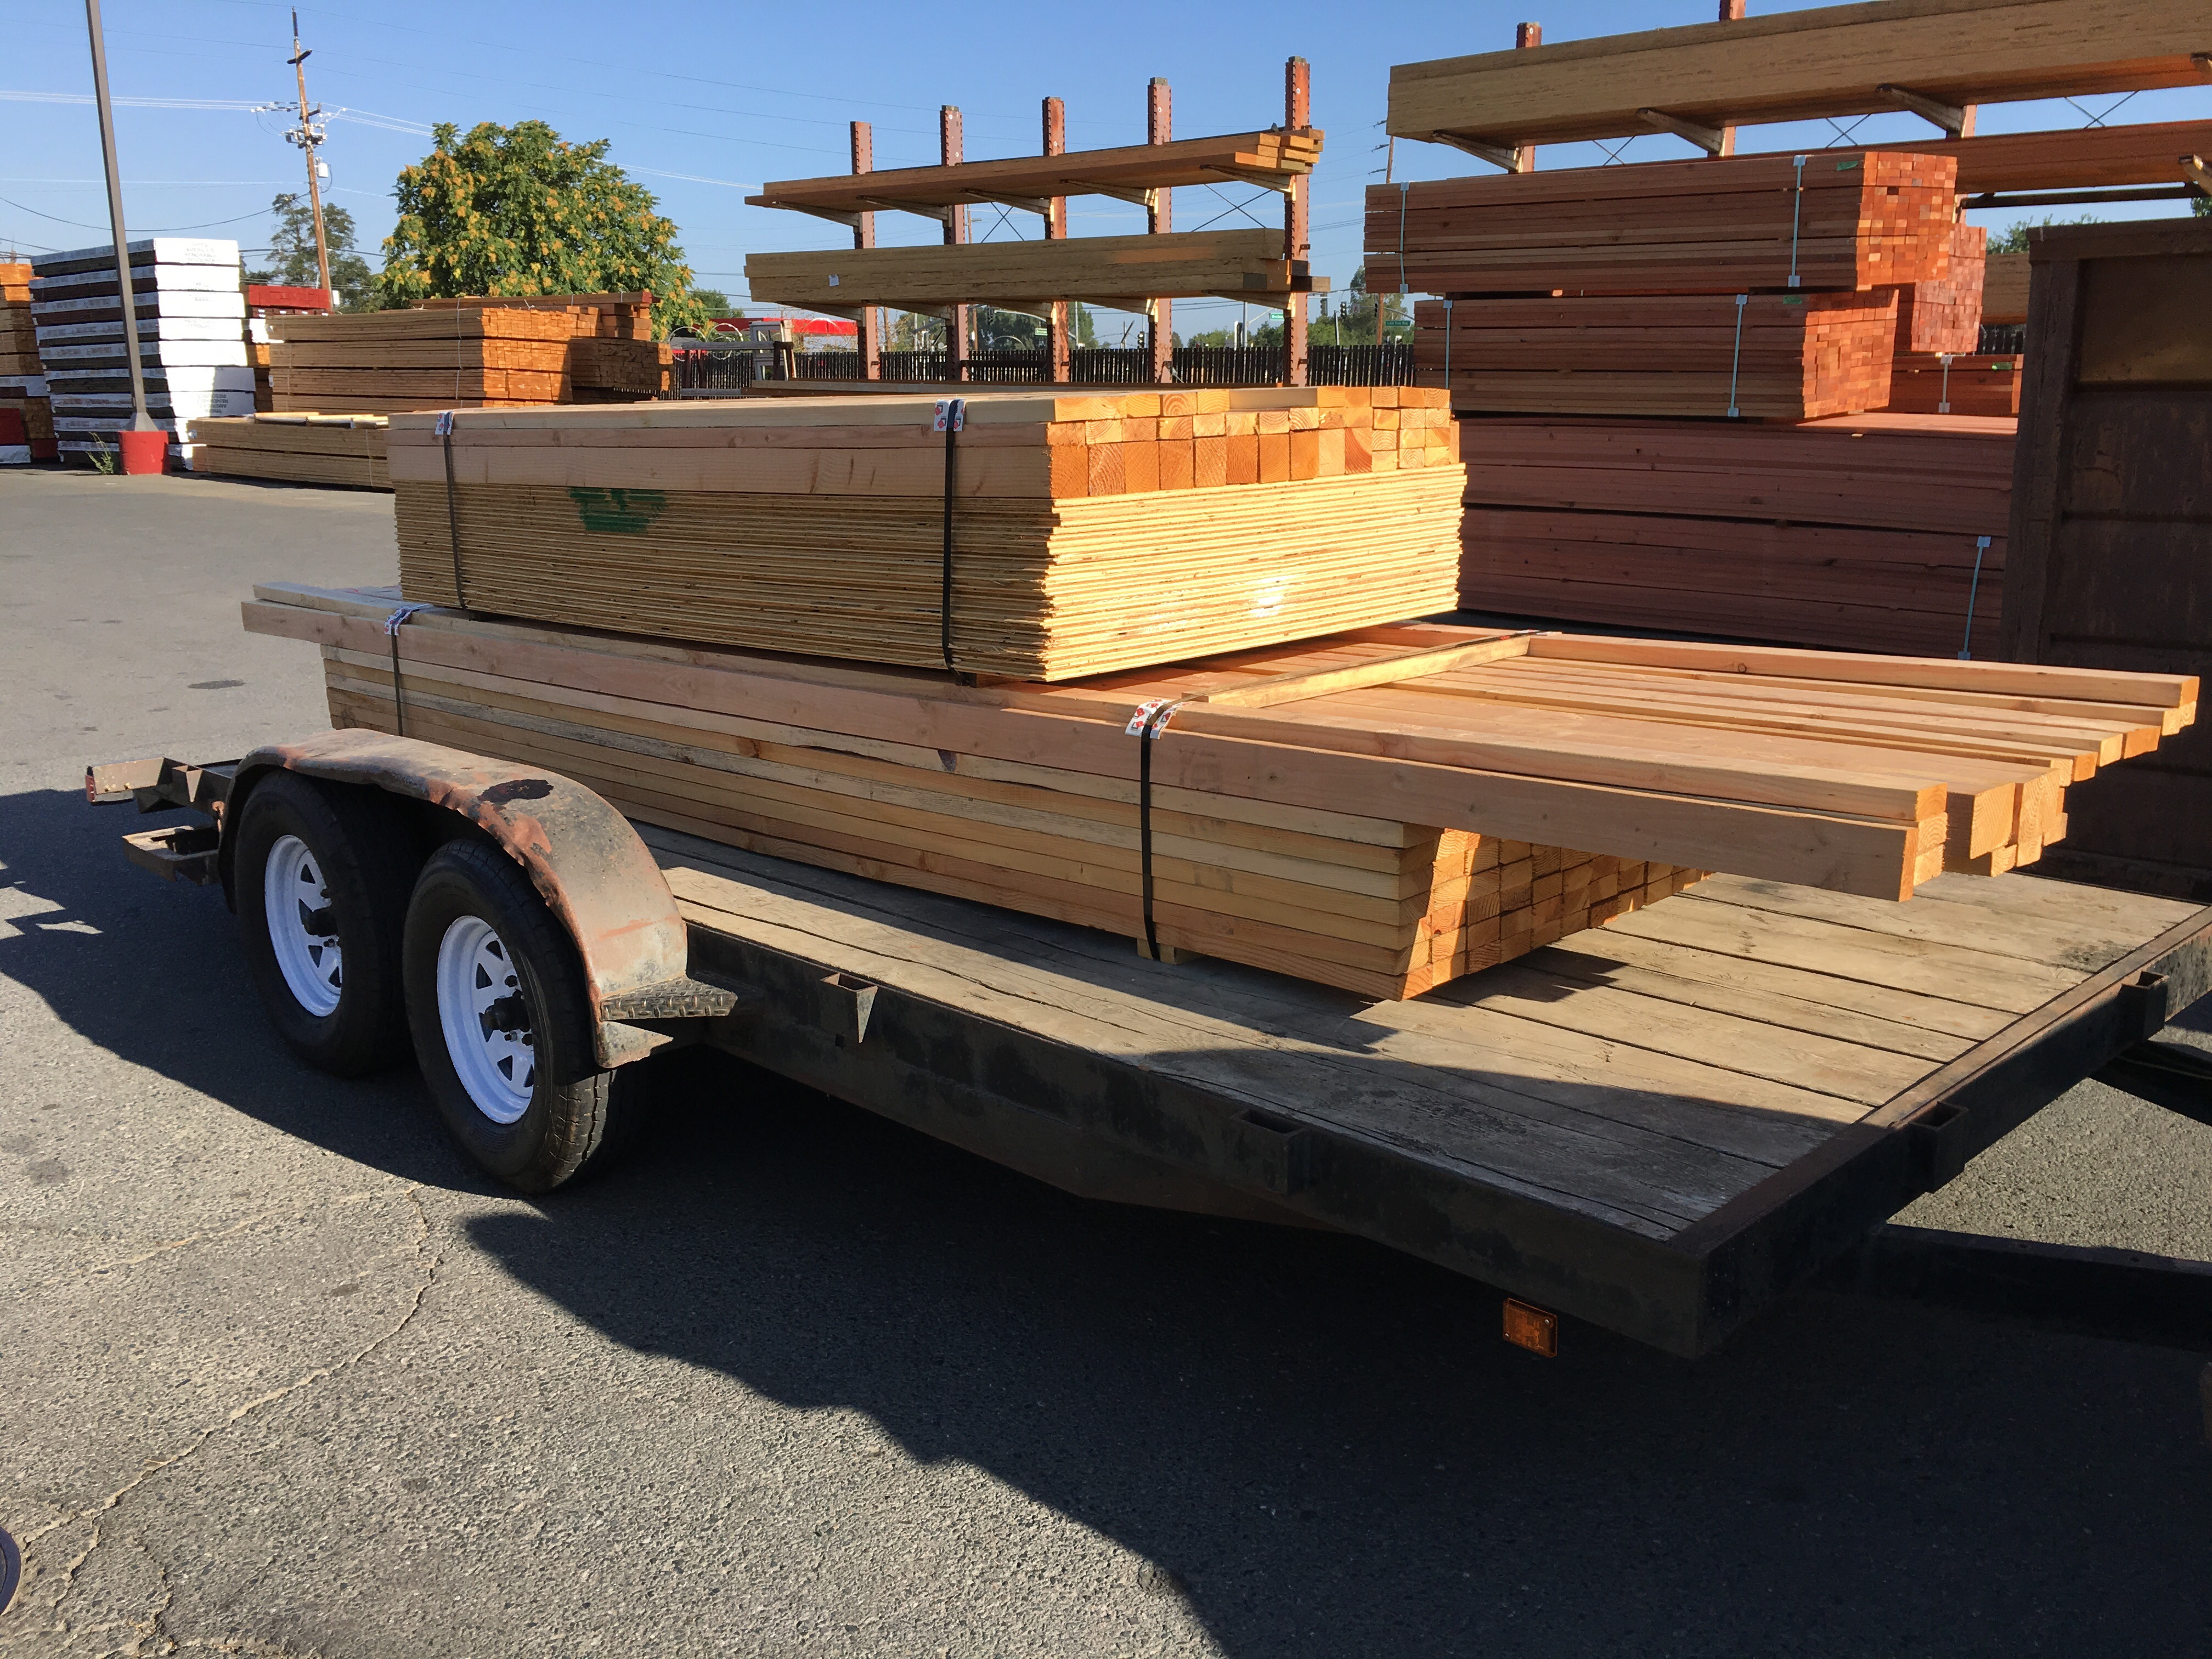
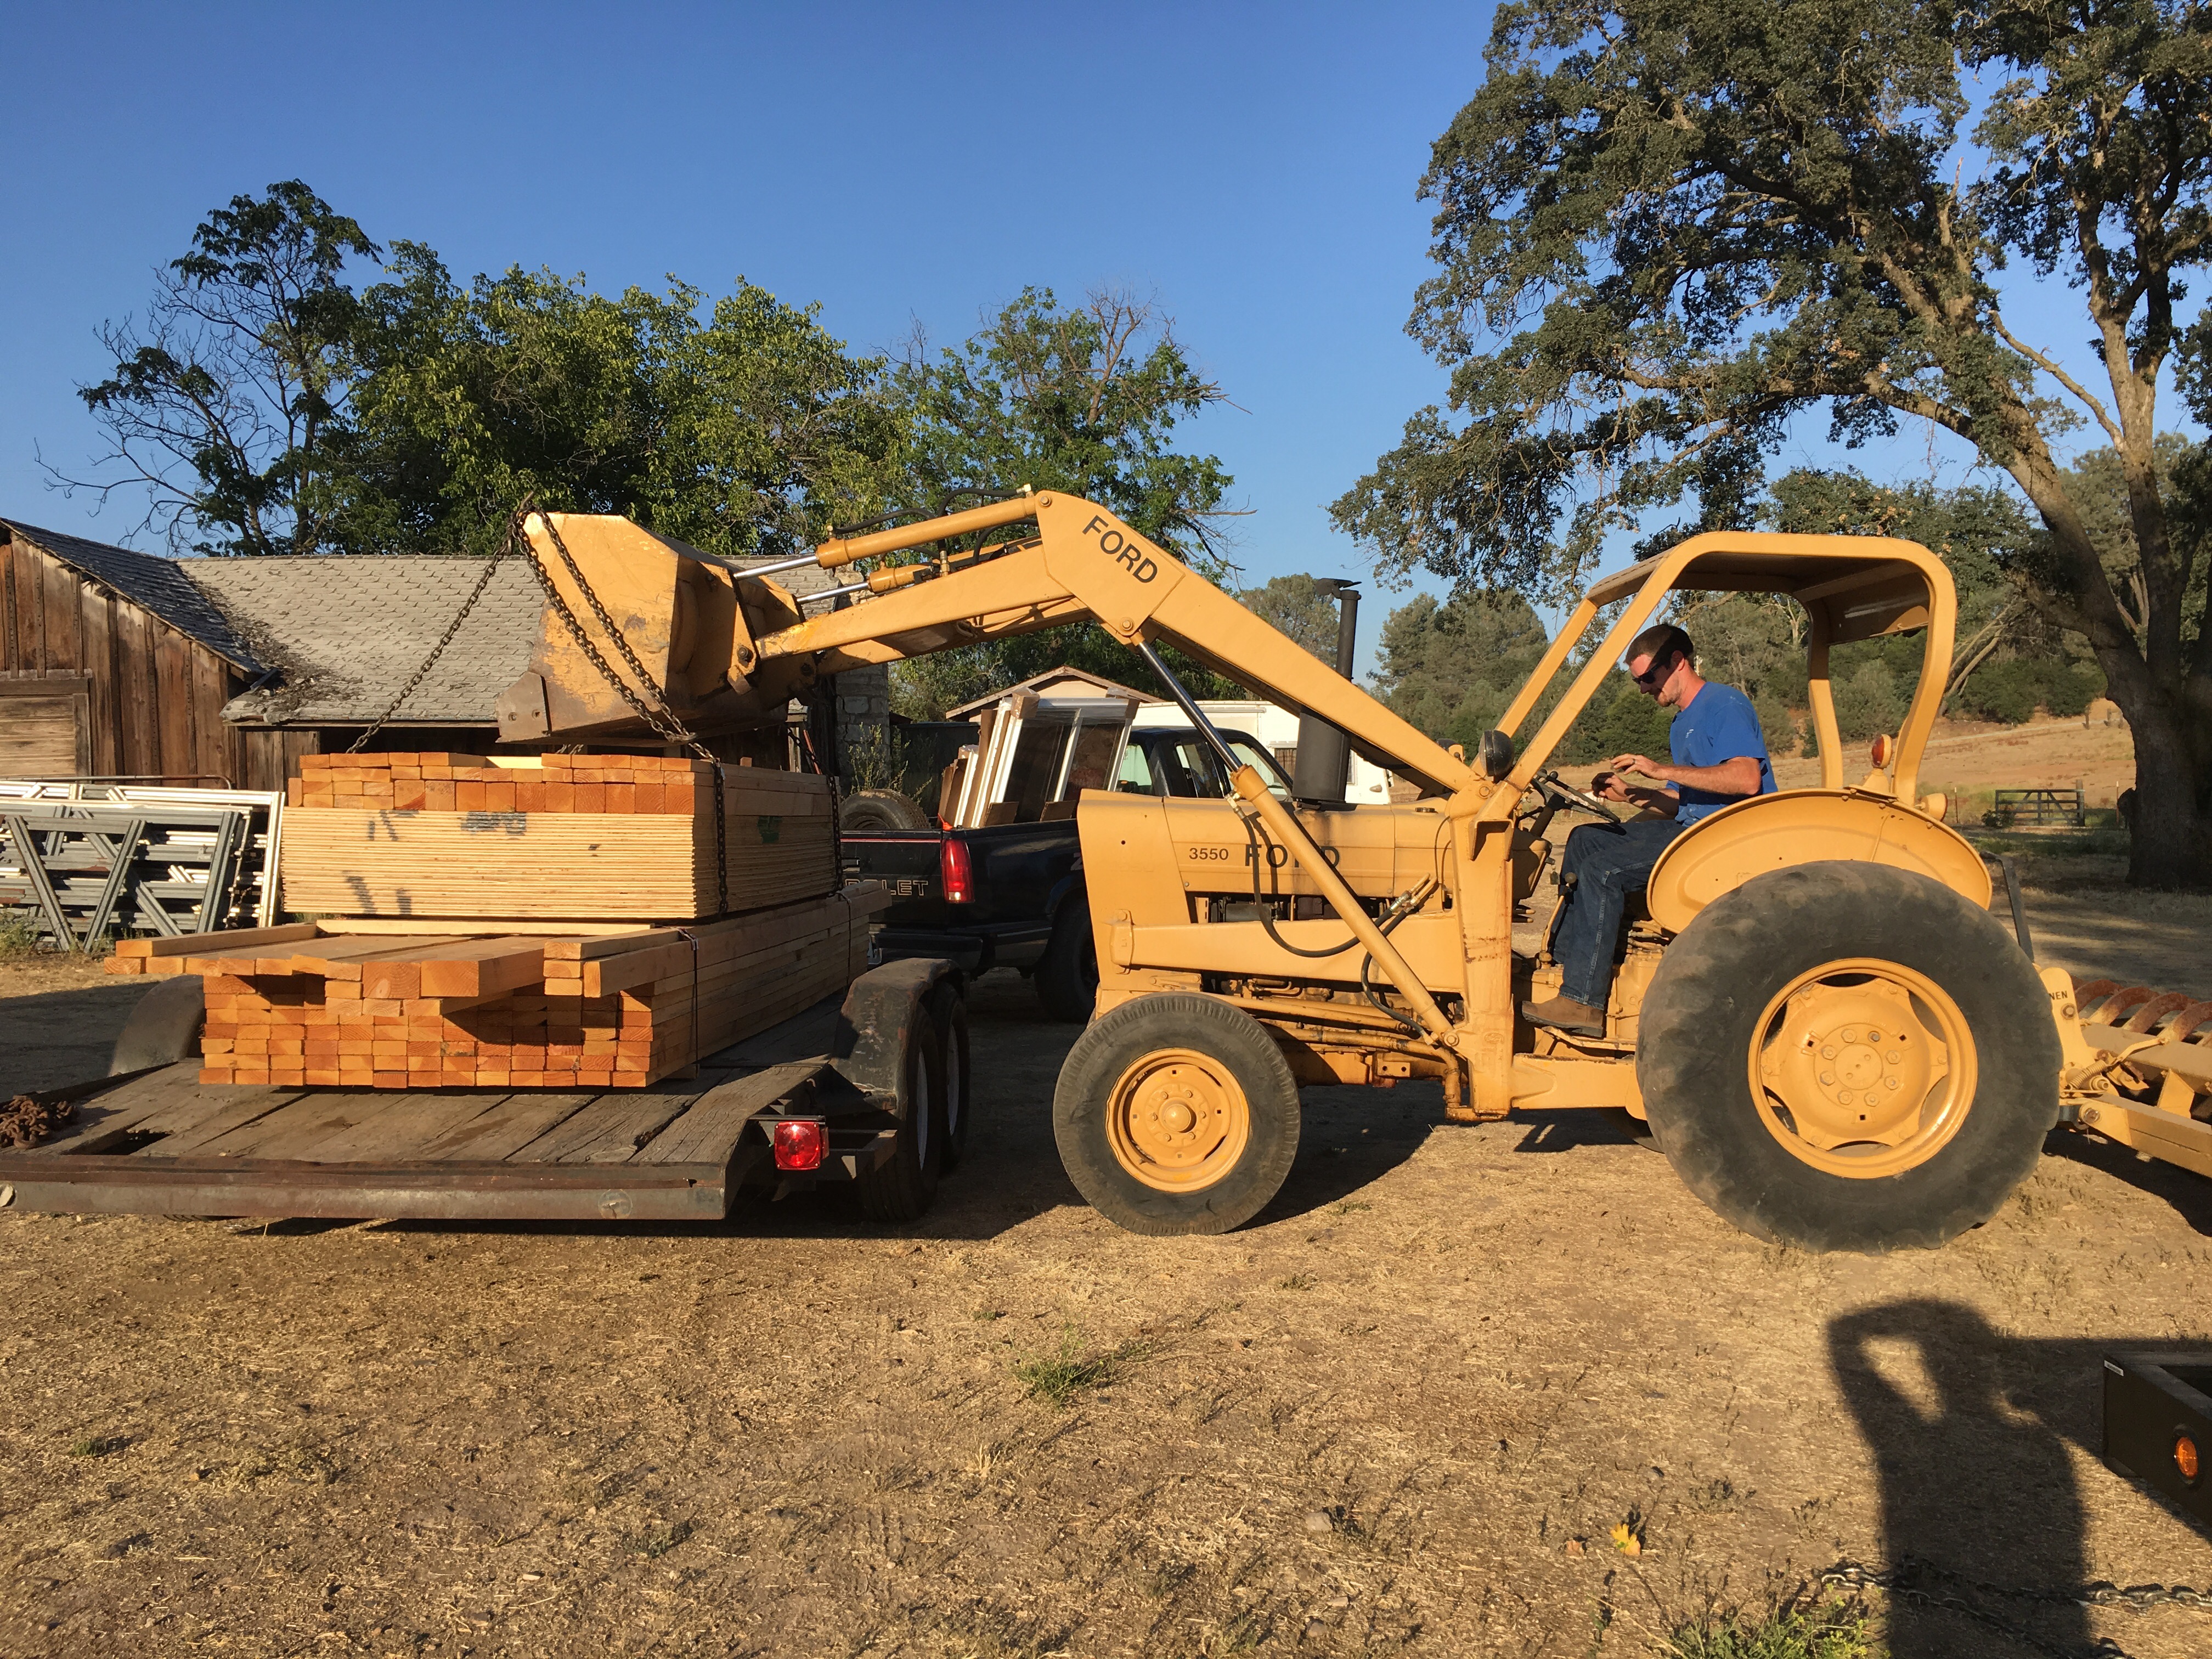
We ordered V-groove pine boards for the ceiling and walls. 

138 to be exact. 

I didn’t count. J did. 

Anyways…

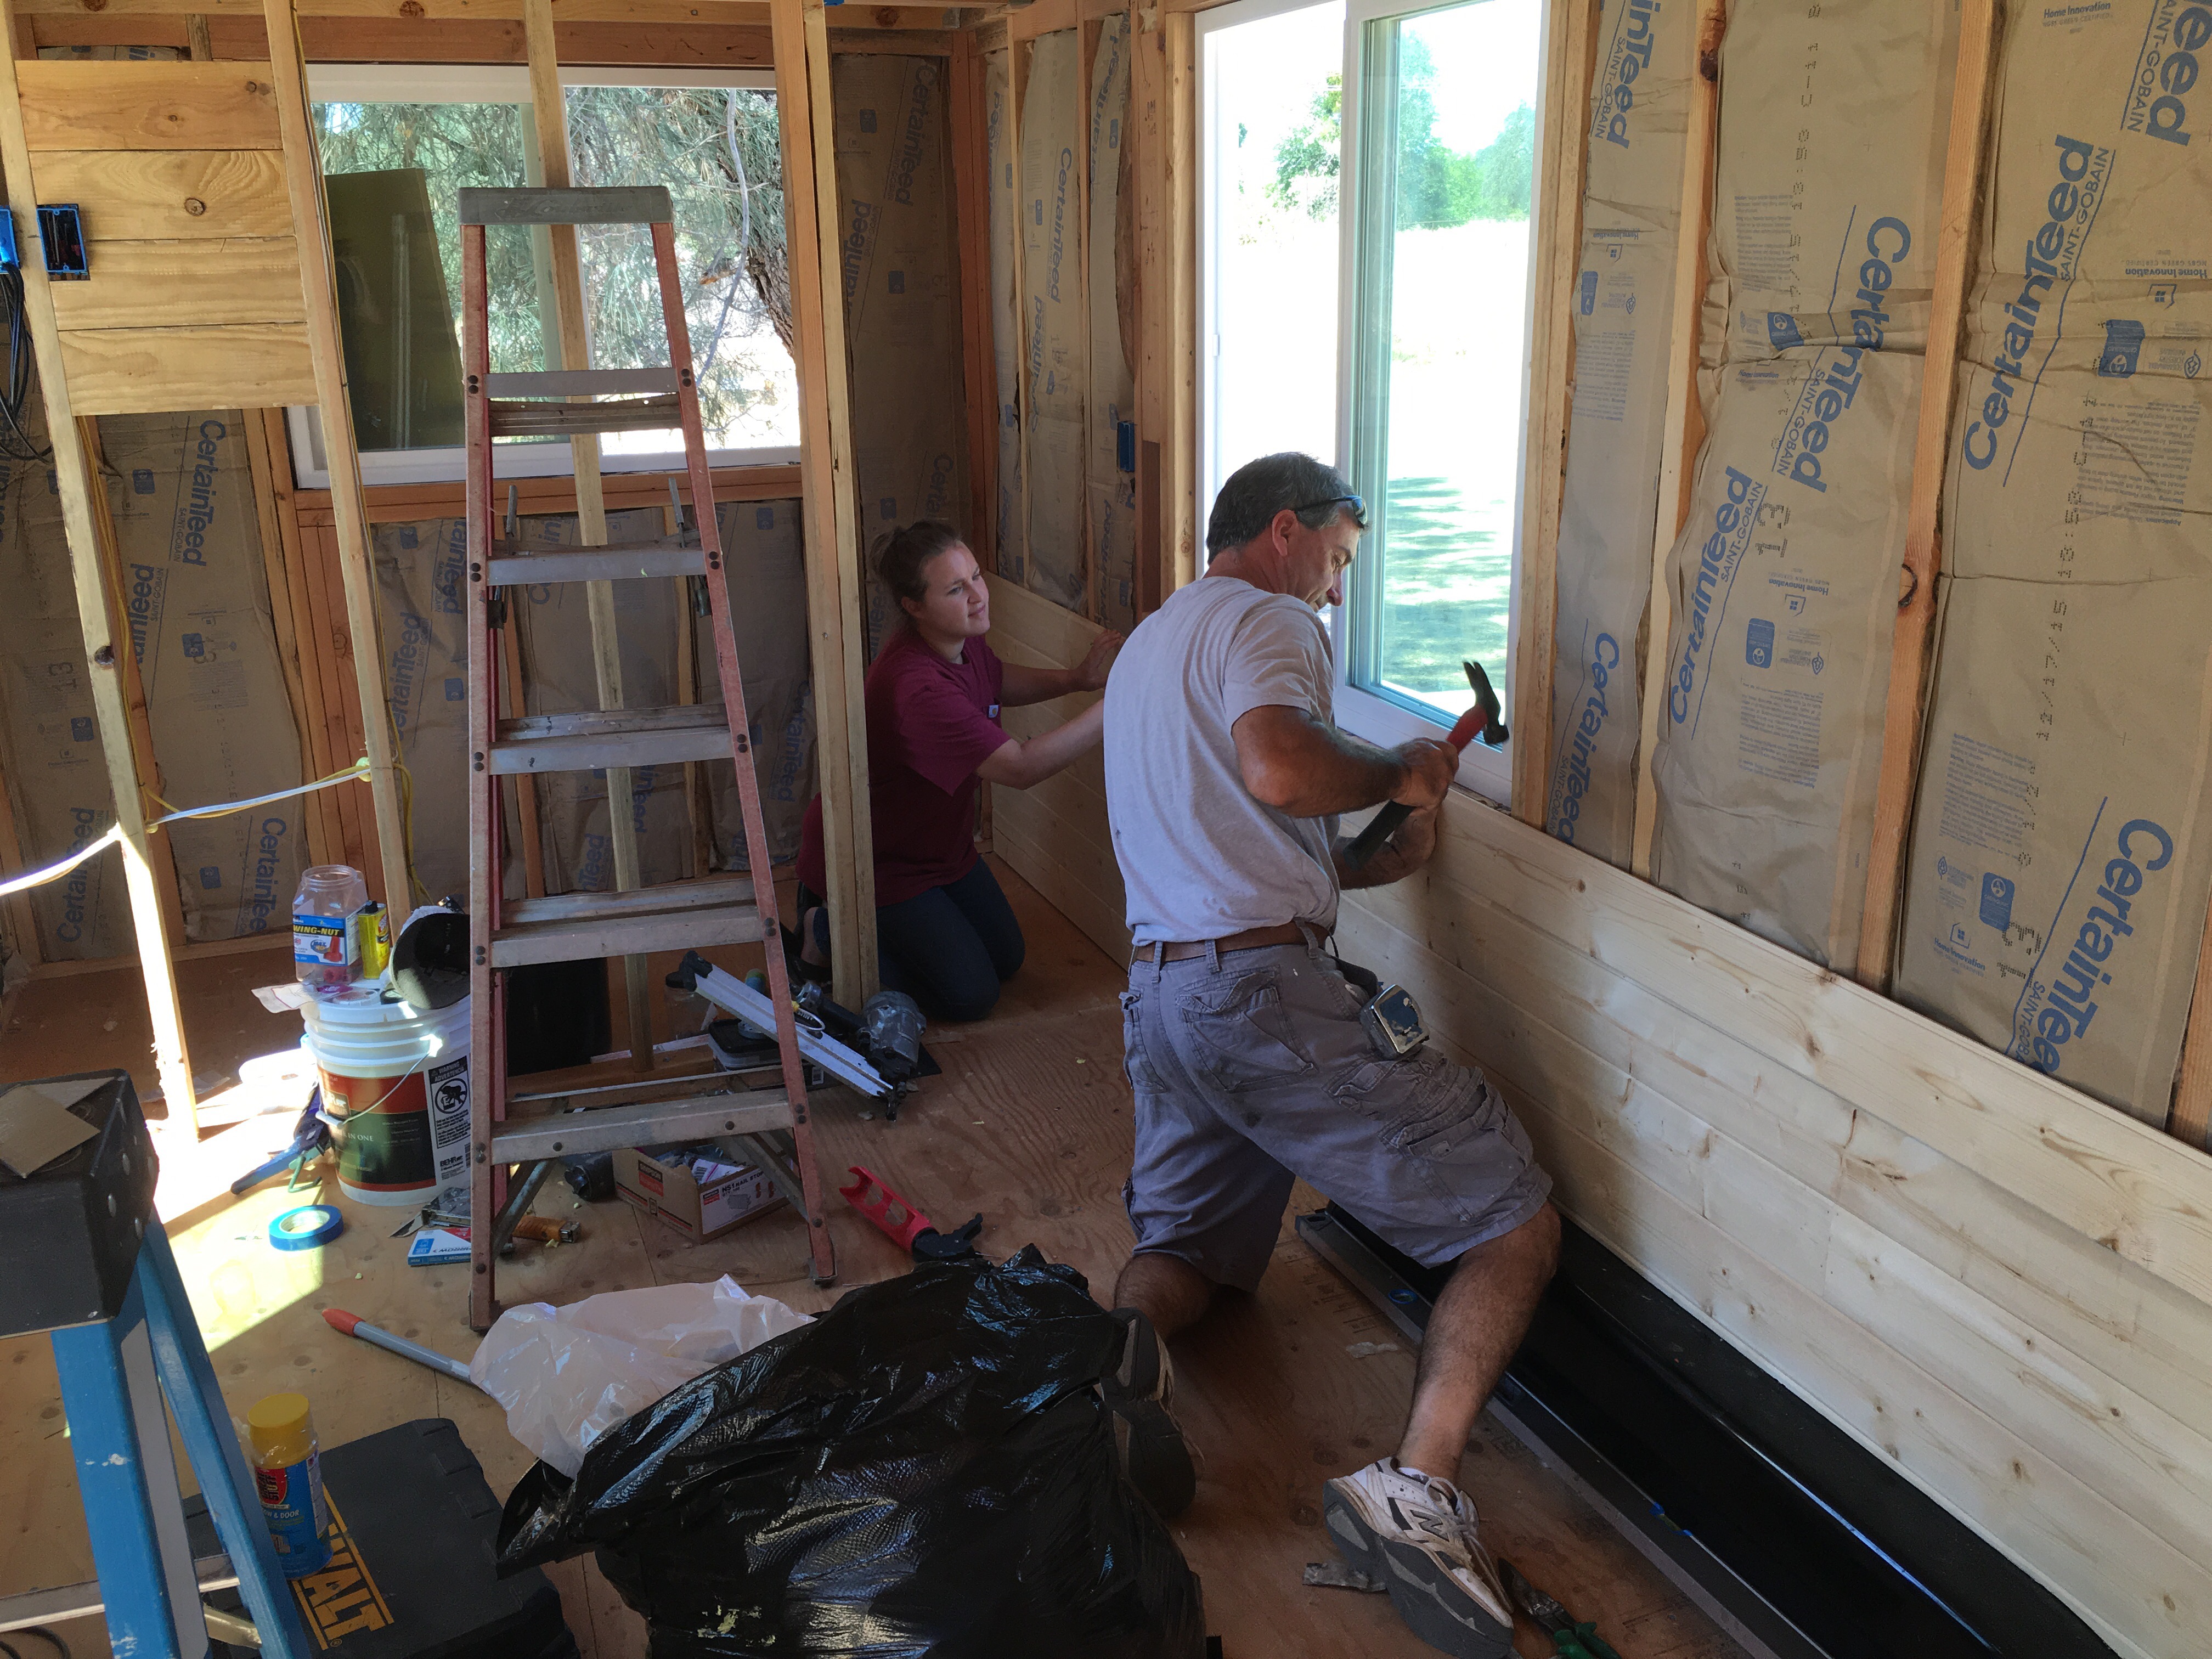
J insulated the walls before hand so when his dad came out, they could get right to installing the boards. 

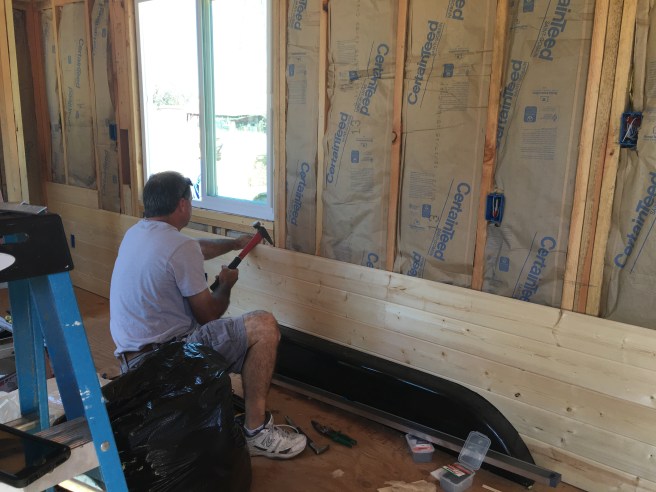
Piece by piece, it went up. It got a little tricky around the wheel wells, but they managed ok! We wanted a tight seal around the edges. 

Sometimes I was called in to help push a board into place. This gal’s not afraid to get her hands dirty! 
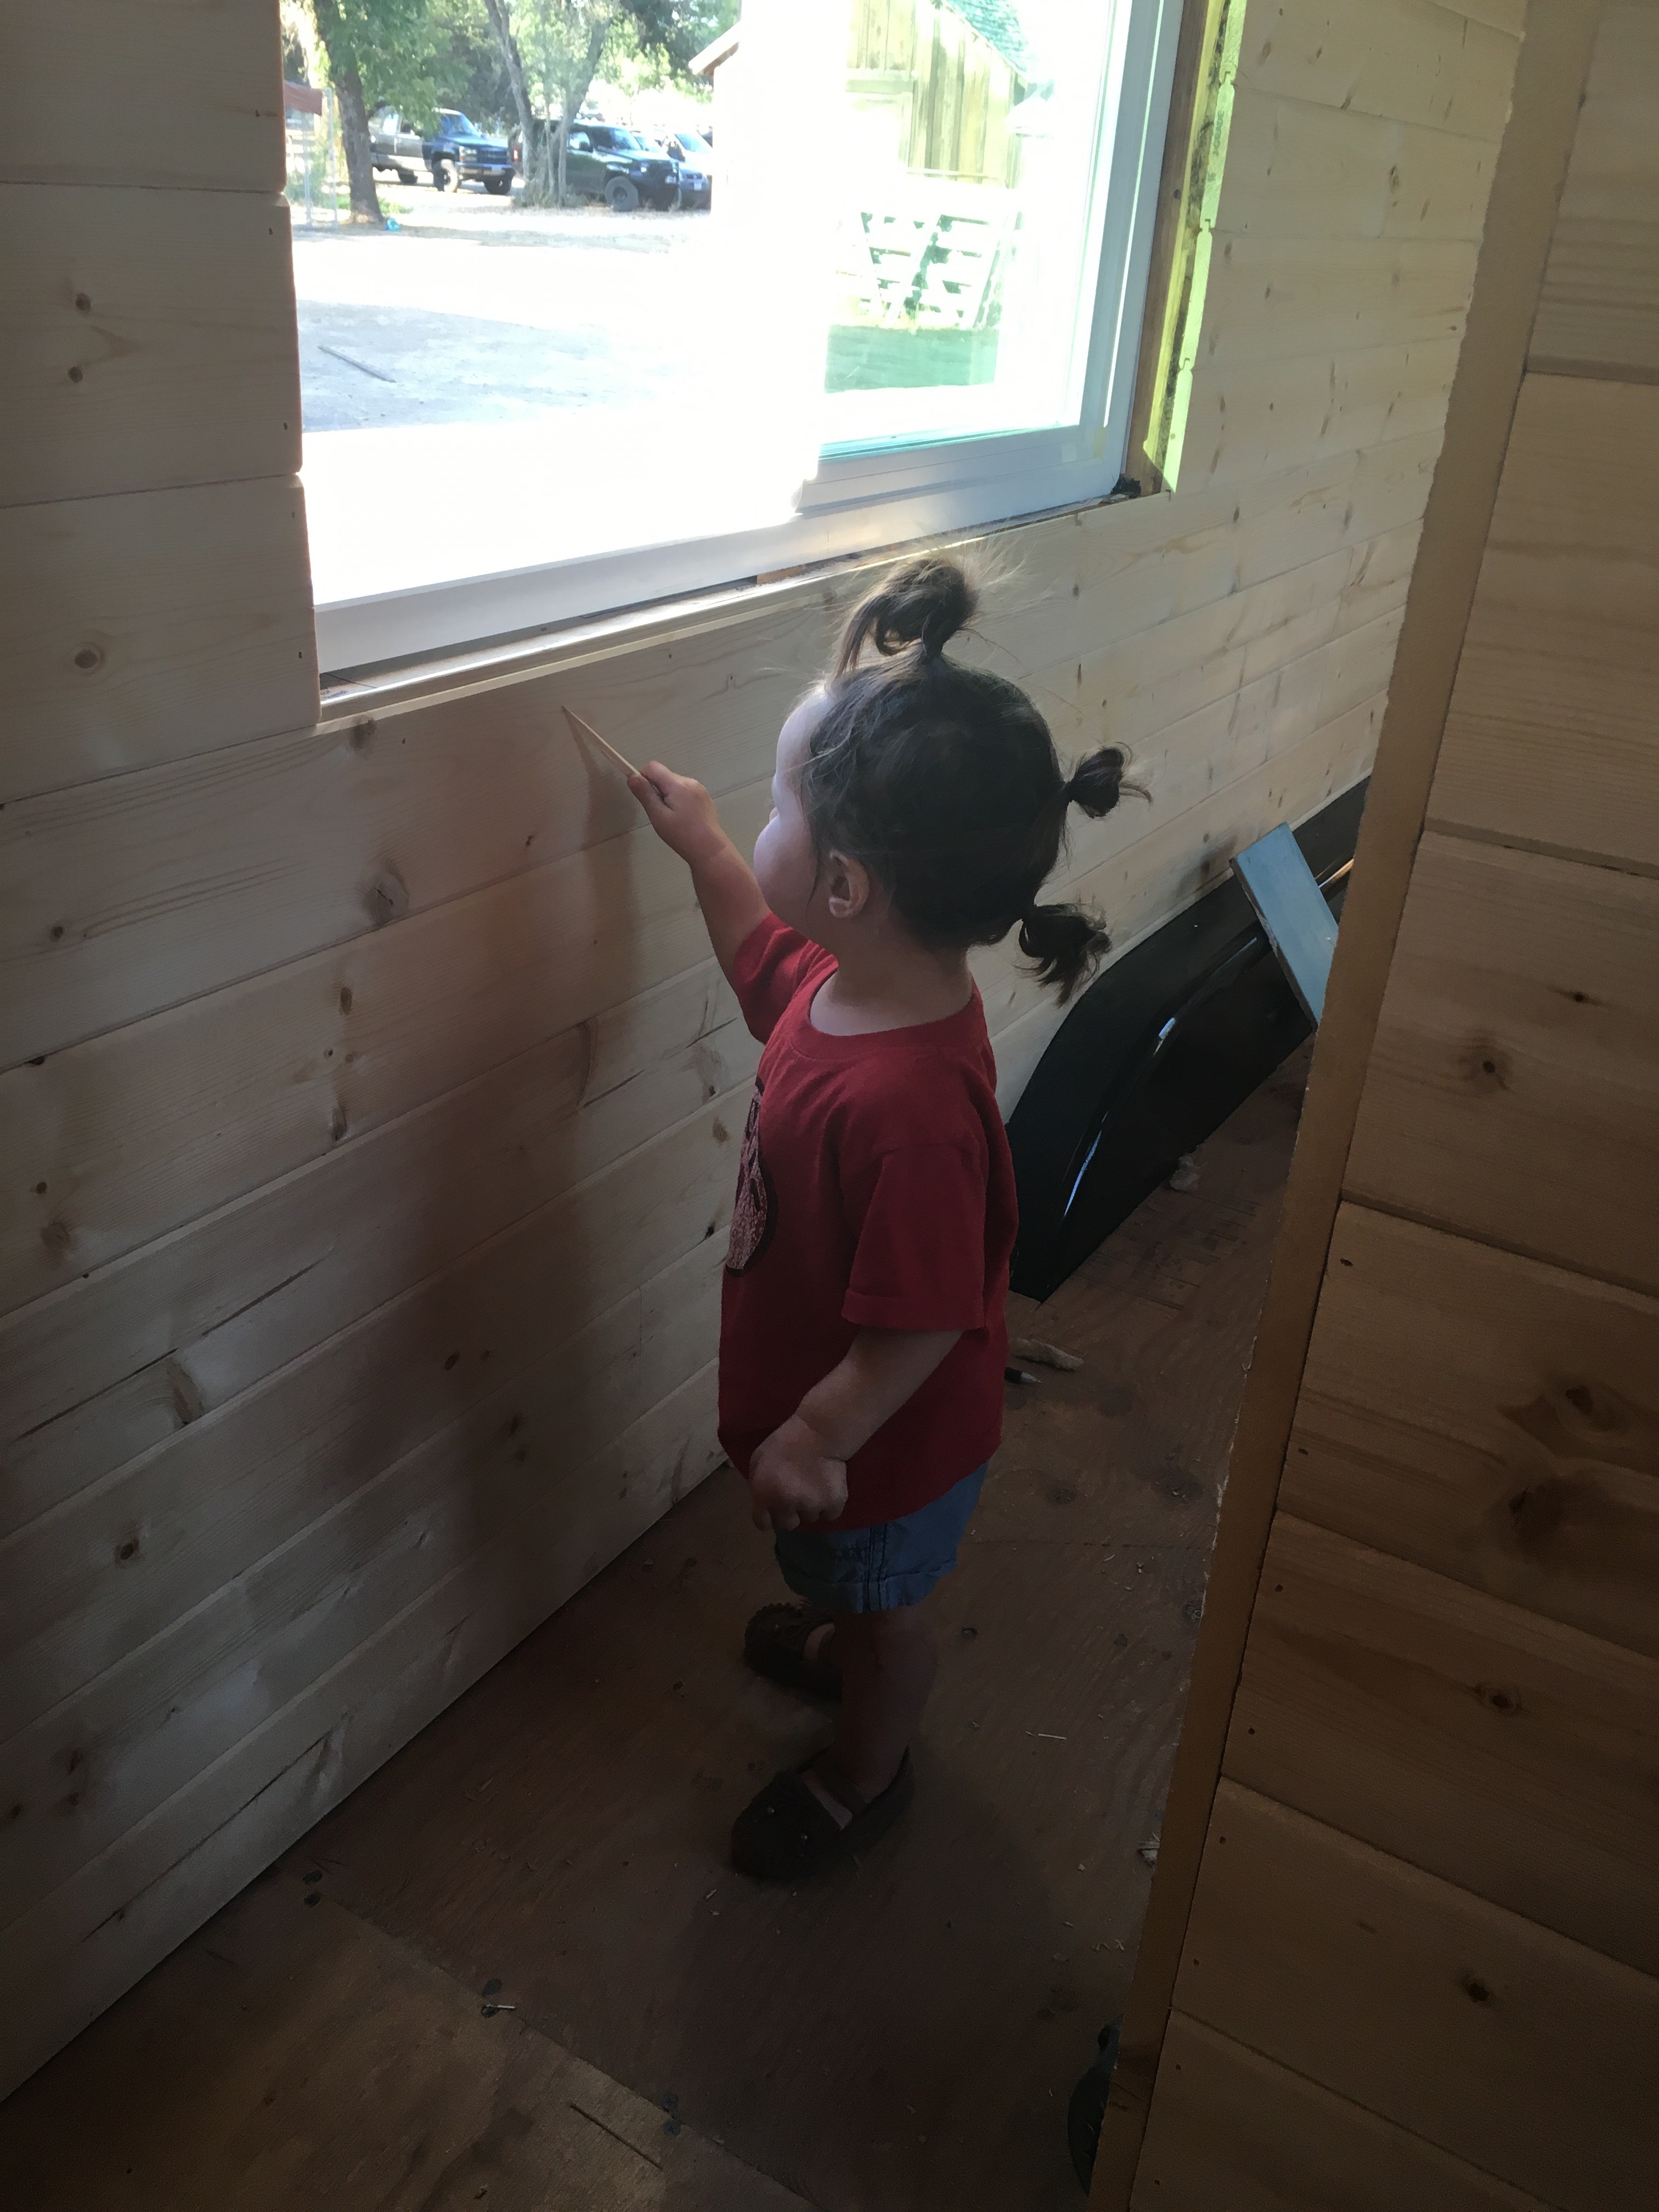
W “helped” too. 

Don’t mind her wacky hairstyle.

This mama has got some crazy hairstylin’ skills. 

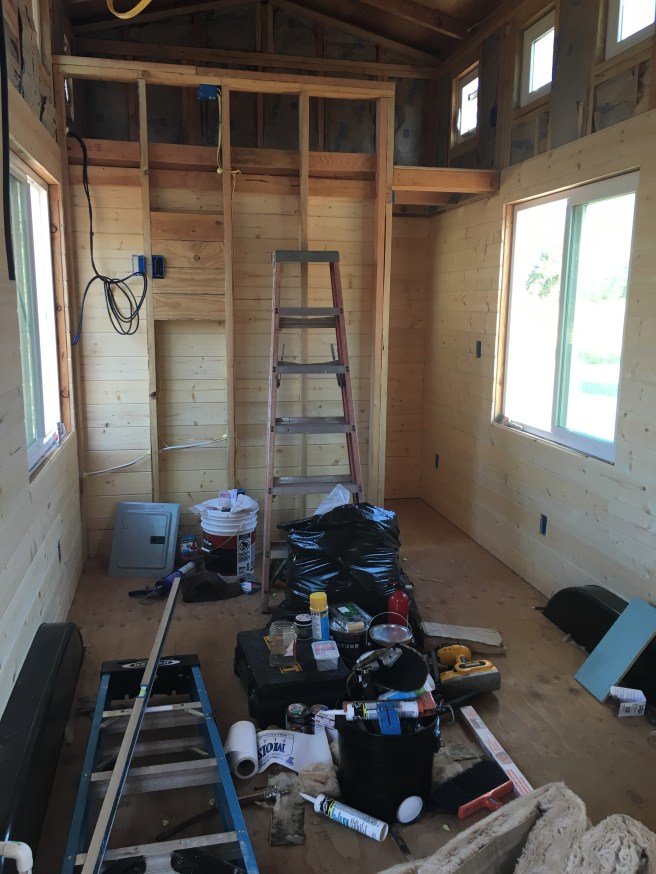
Please excuse the mess. 

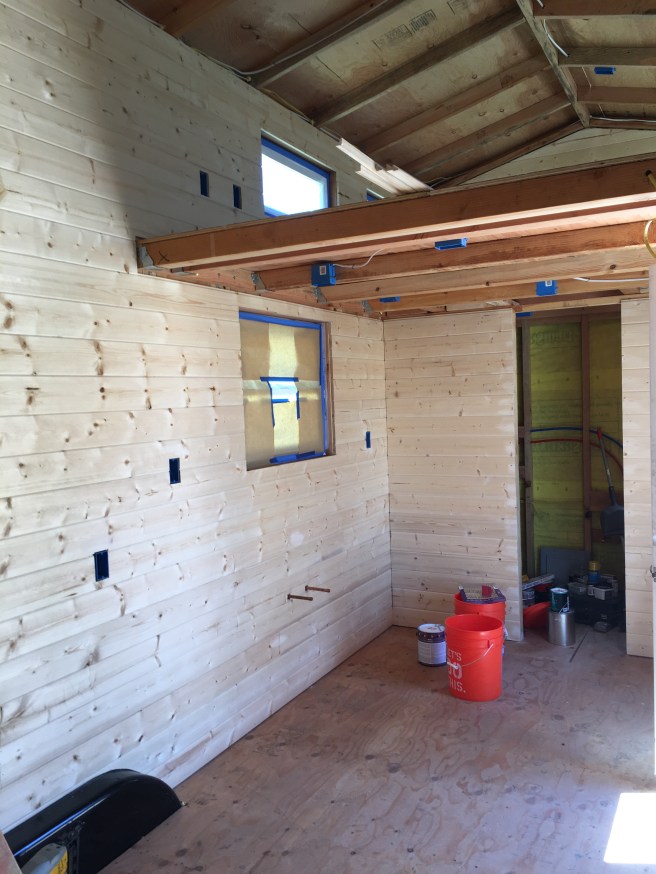
Next came taping off all the windows and the door. 

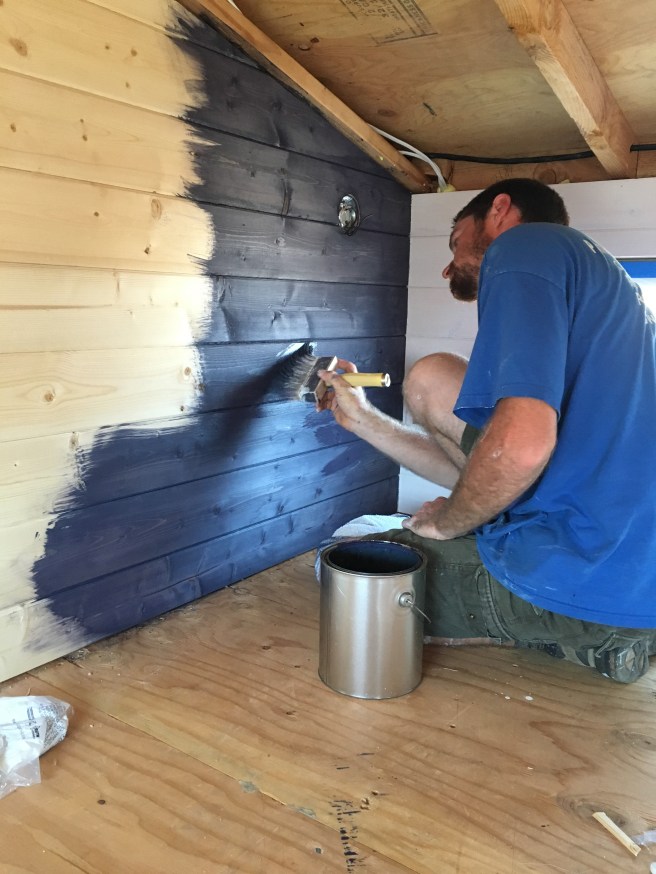
At this moment, the tiny house was too cabin-y. A few members of our family told us not to paint the walls because of the beautiful wood. 

But that wasn’t the look that we were going for. So we decided to whitewash.

And with whitewashing comes paint flecks.

EVERYWHERE. 

Hence the paper and plastic. Protect your glass!

To whitewash, we picked our gallon of white, then diluted it in a large 5 gallon bucket with water. Our ratio was 1:1.5.

We experimented with applying the whitewash and then immediately wiping off the excess, but we liked it better when it wasn’t wiped off. 

In the above picture, it has only been applied once. Not liking the patchiness, we put on a second coat and that took the patches away. 

Much better!

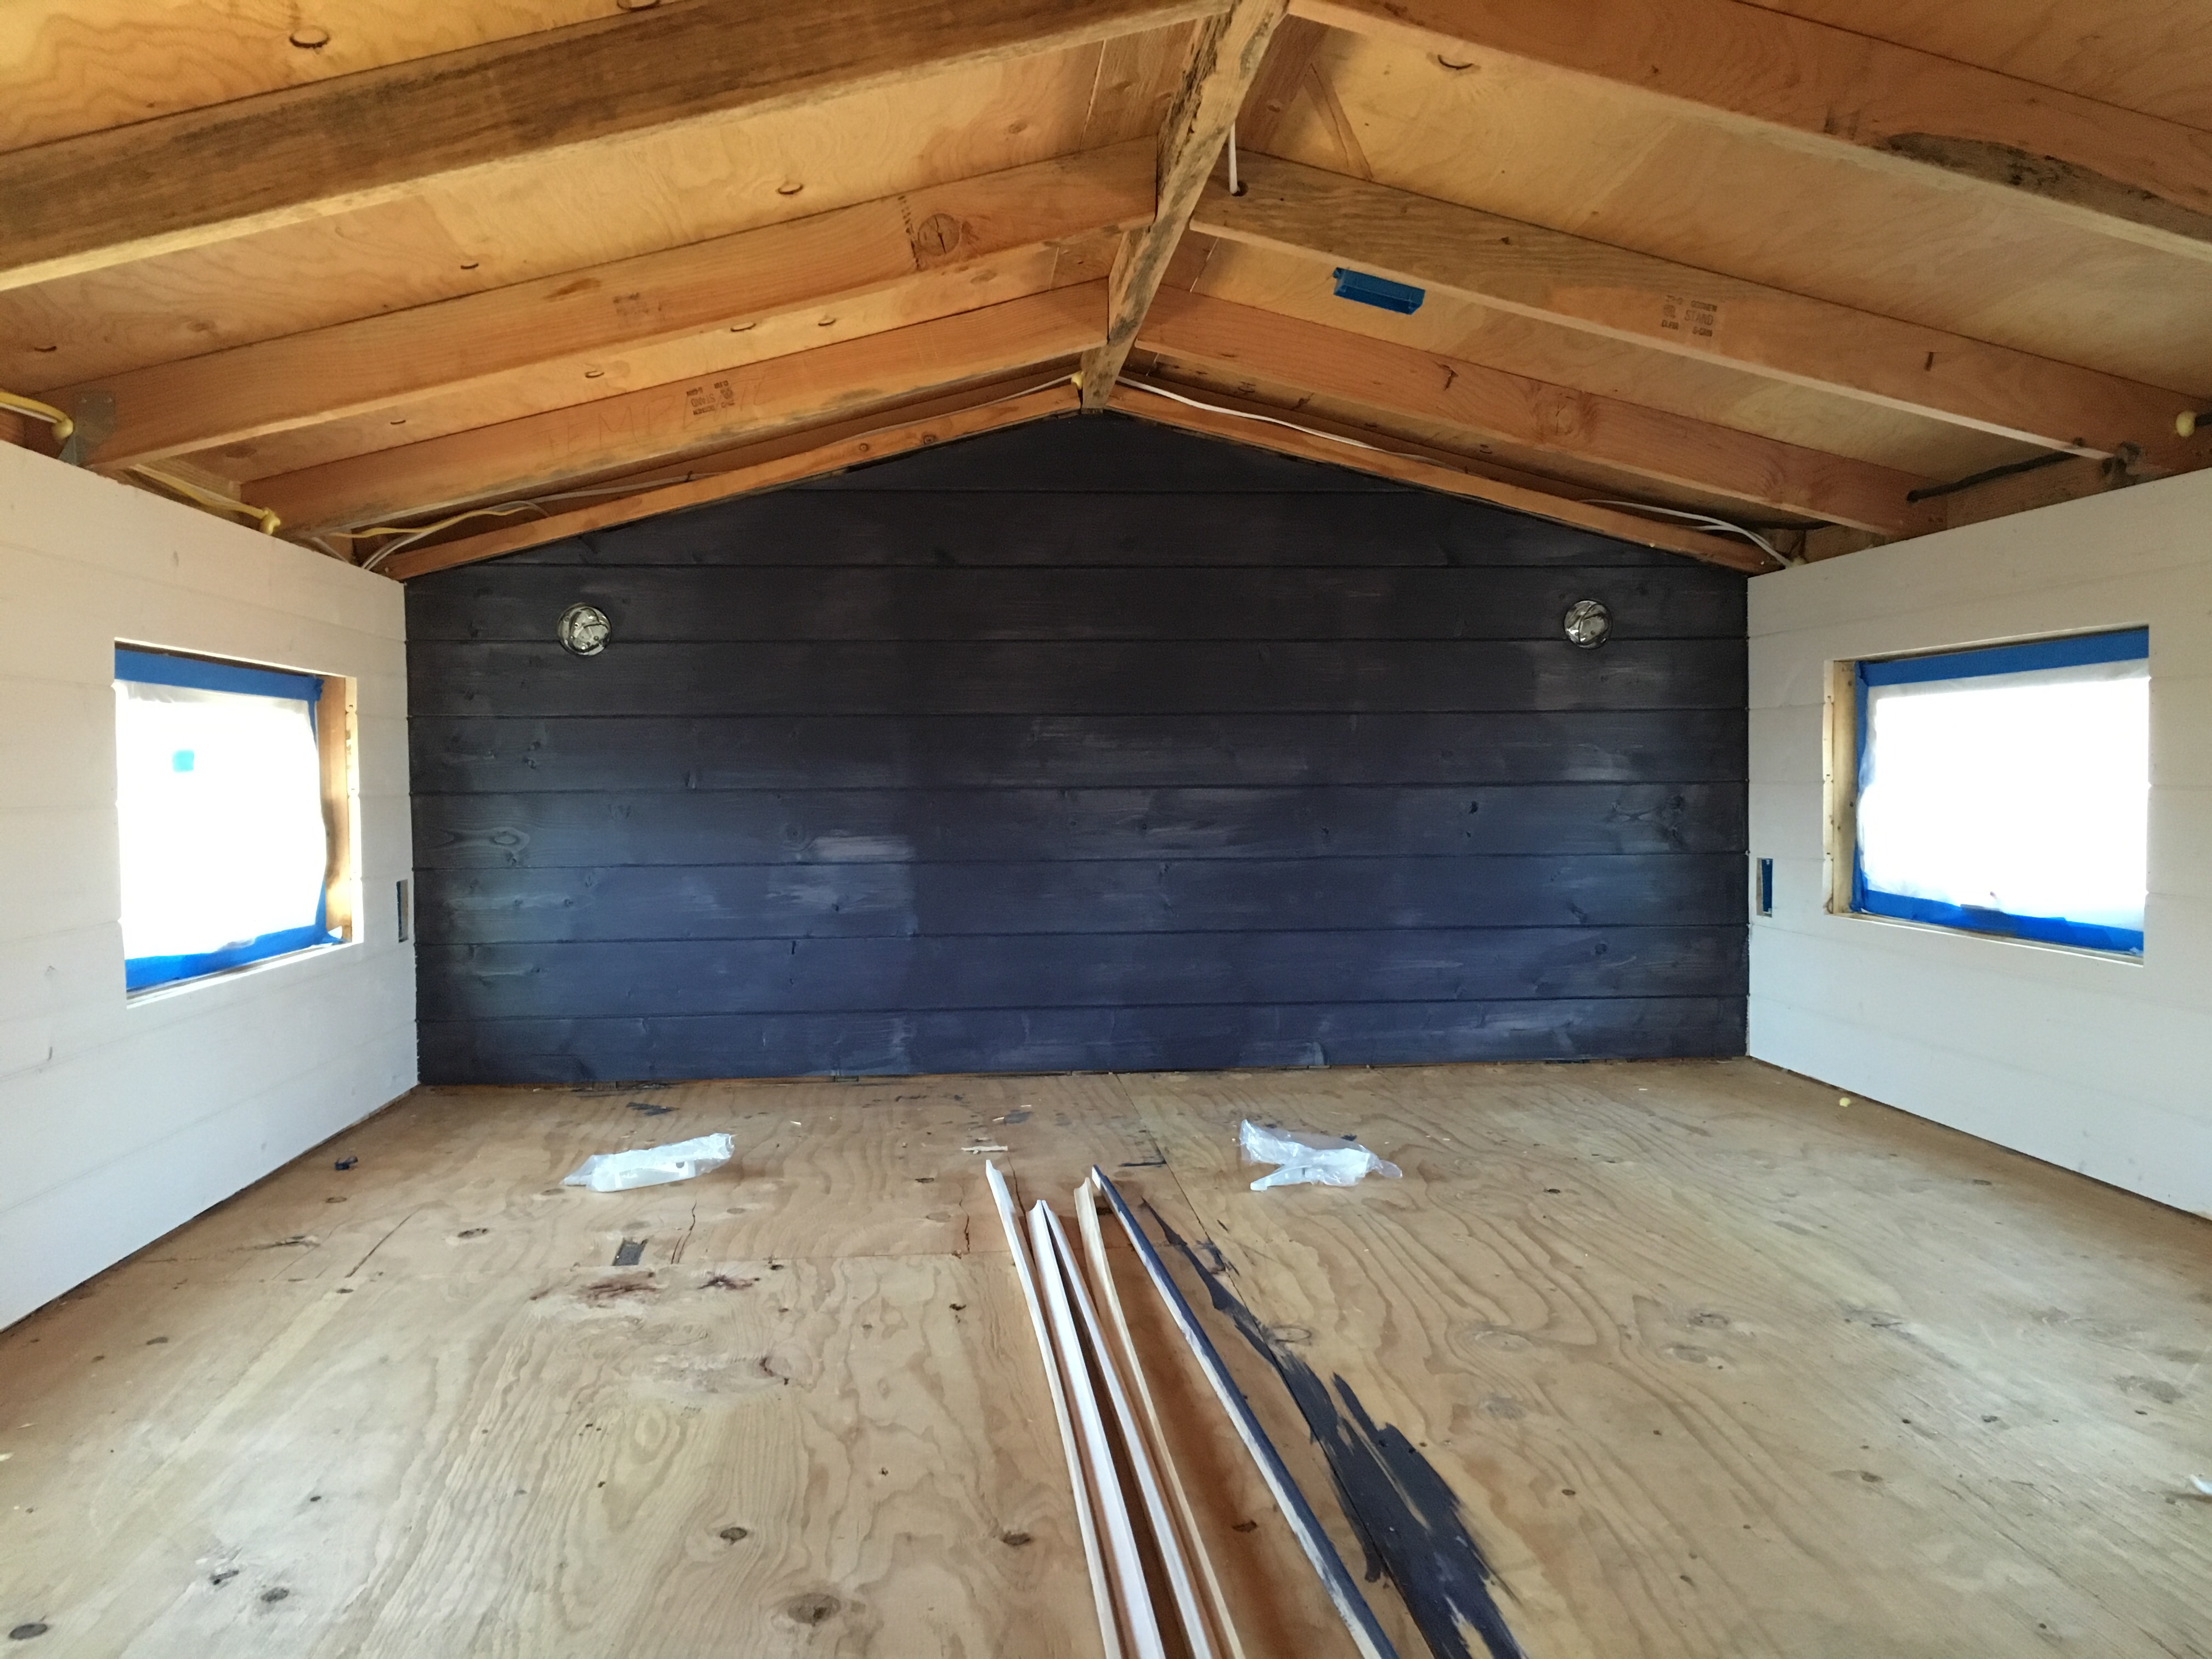
In our master loft, we wanted to have the headboard wall make a statement, but with a little one, we didn’t want pictures or shelves above our heads for easy destruction, so we opted for a color wash.
It’s very similar to whitewashing, but with, you guessed it, color. 

I think this ratio was 1:1. 

Now this is where we had an oops.

As we never had color washed anything before, we thought it’d be the same as whitewashing. 

Not so much. 

The color was so dark, it seeped into the dry wood faster than we could wipe it off. 

J also put it on right to left, instead of top to bottom. It made it so you could see the areas where he started and stopped.

It looked like giant dark lines dividing up the wall. 

Not so pretty. 

But what to do???

J decided that he wasn’t going to settle, so he decided to sand off as much as he could and then re-apply it with a more watered down color wash. 

What happened next turned our frowns upside down! 

Sanding it took out the dark lines, but it also exposed more of the wood grain and turned the whole wall into what we refer to as weathered wood. 

So much easier on the eyes.

Now for the fire.

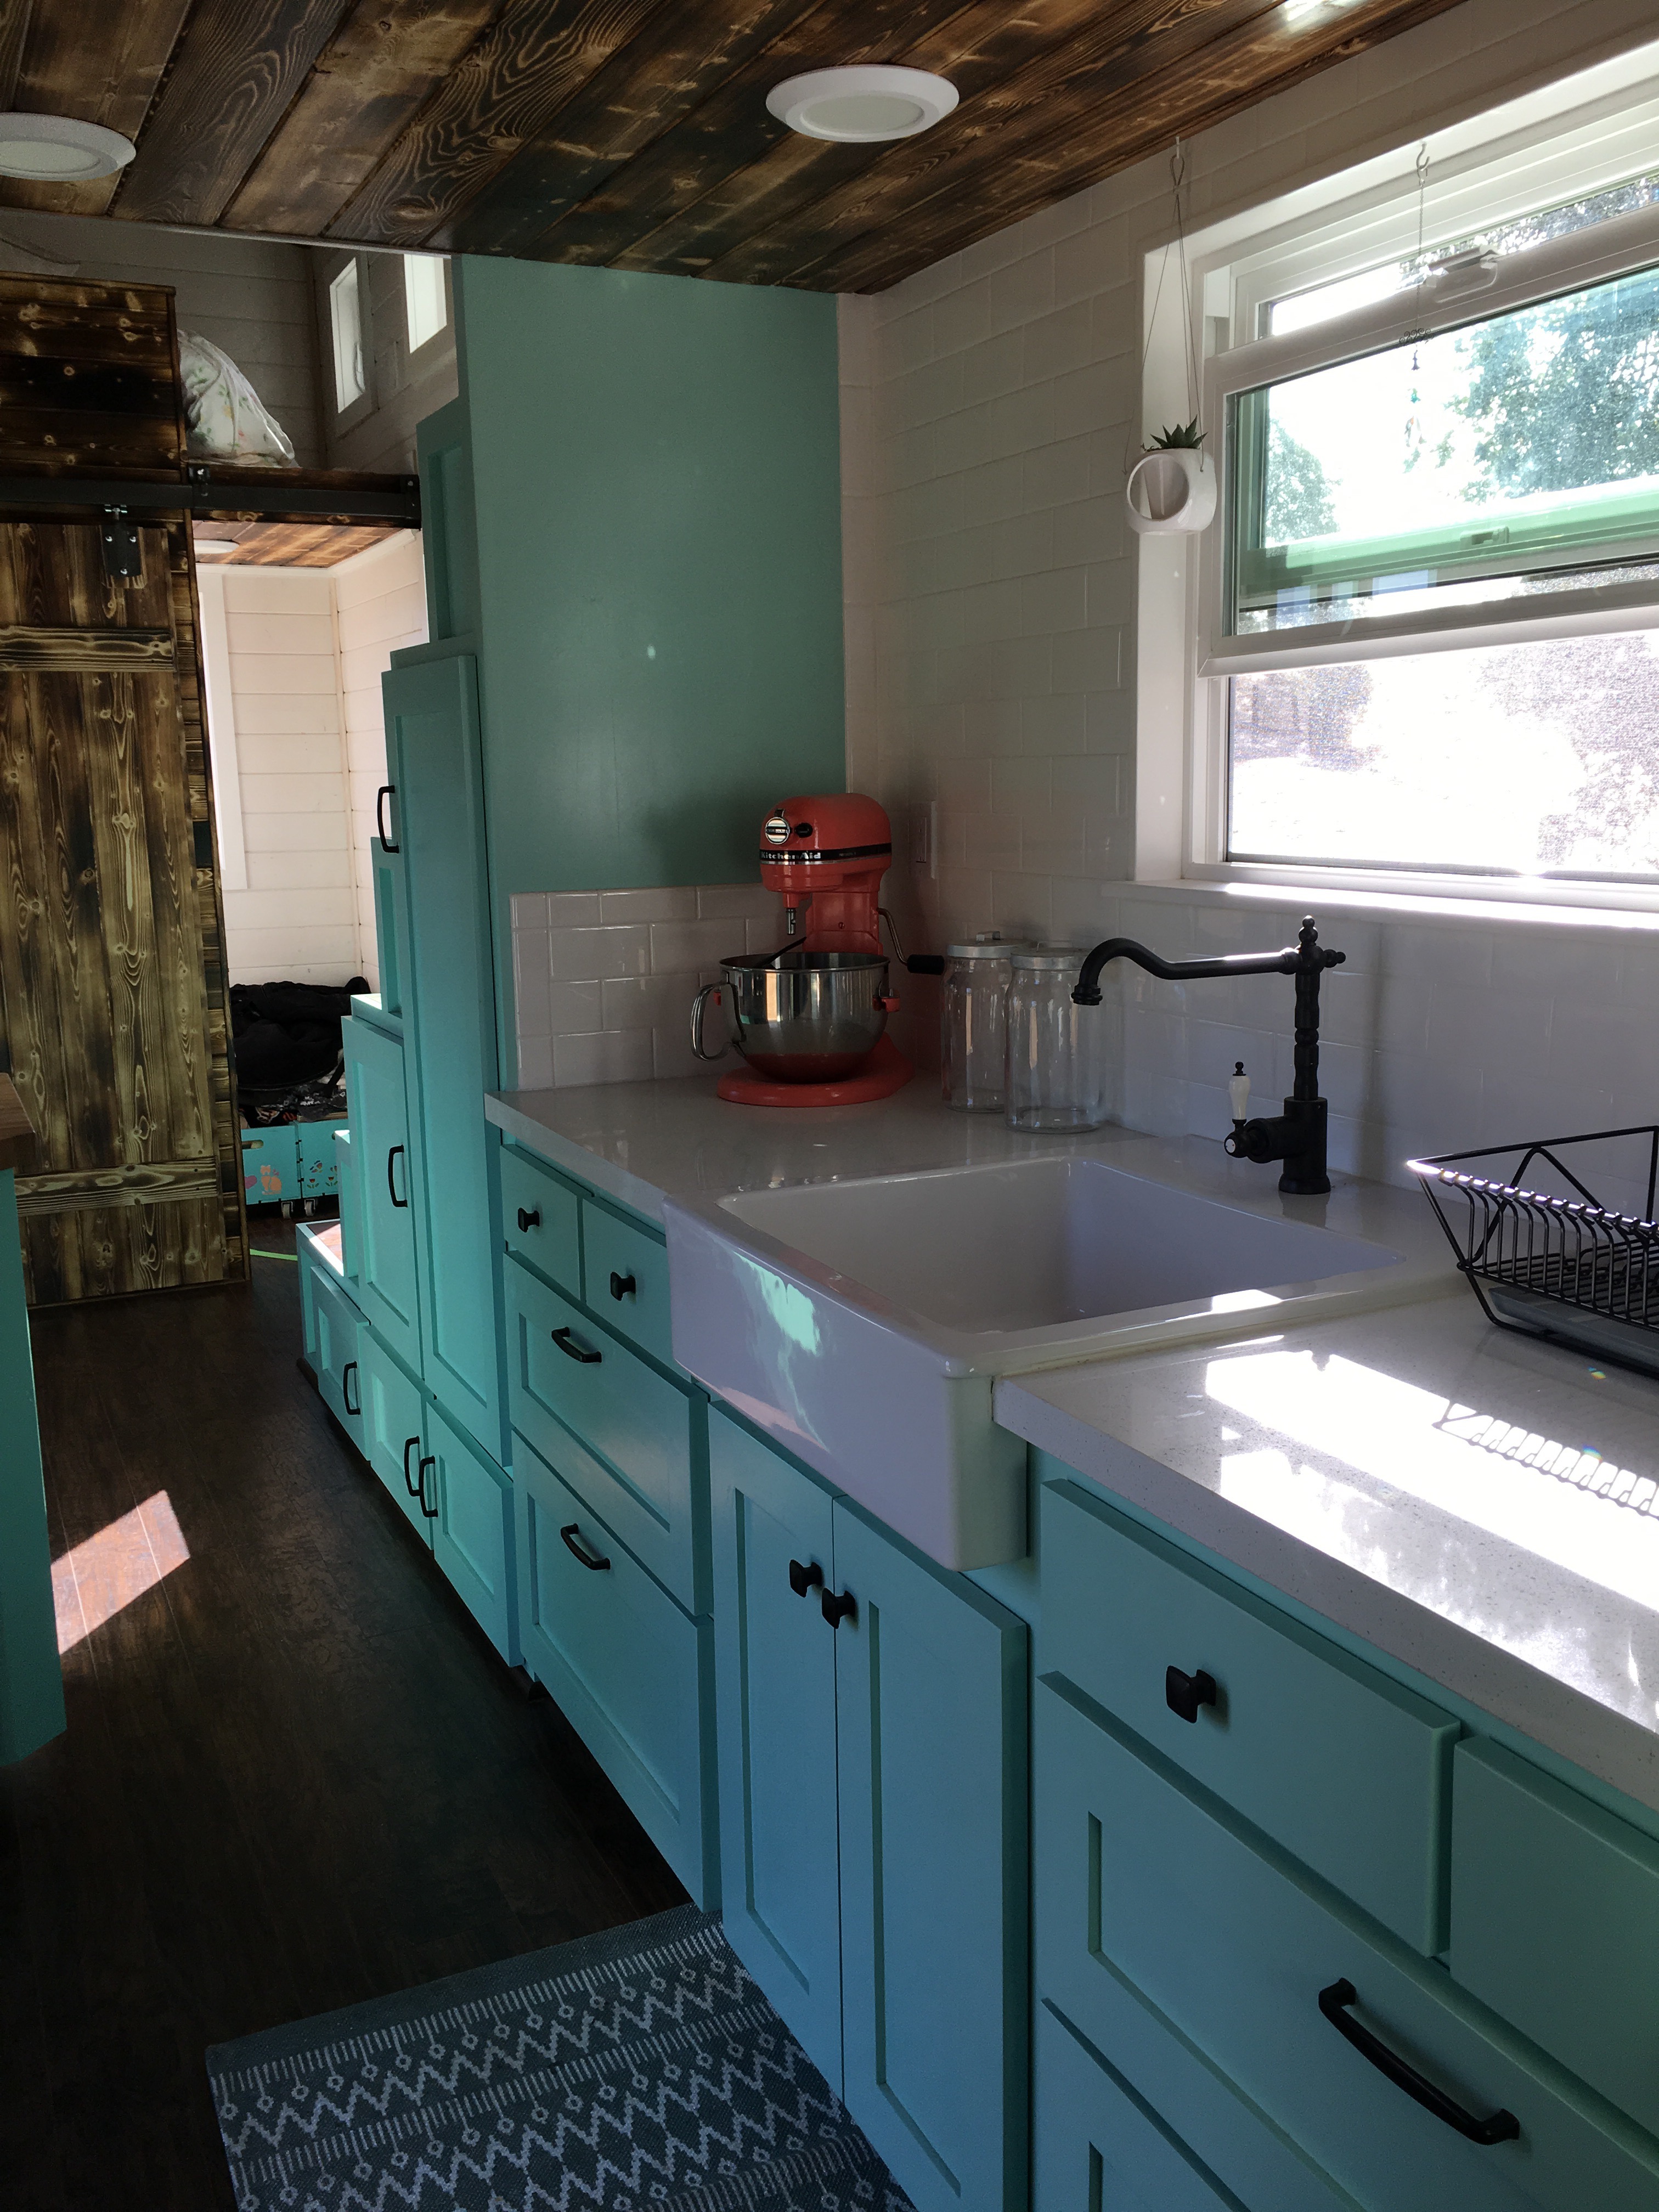
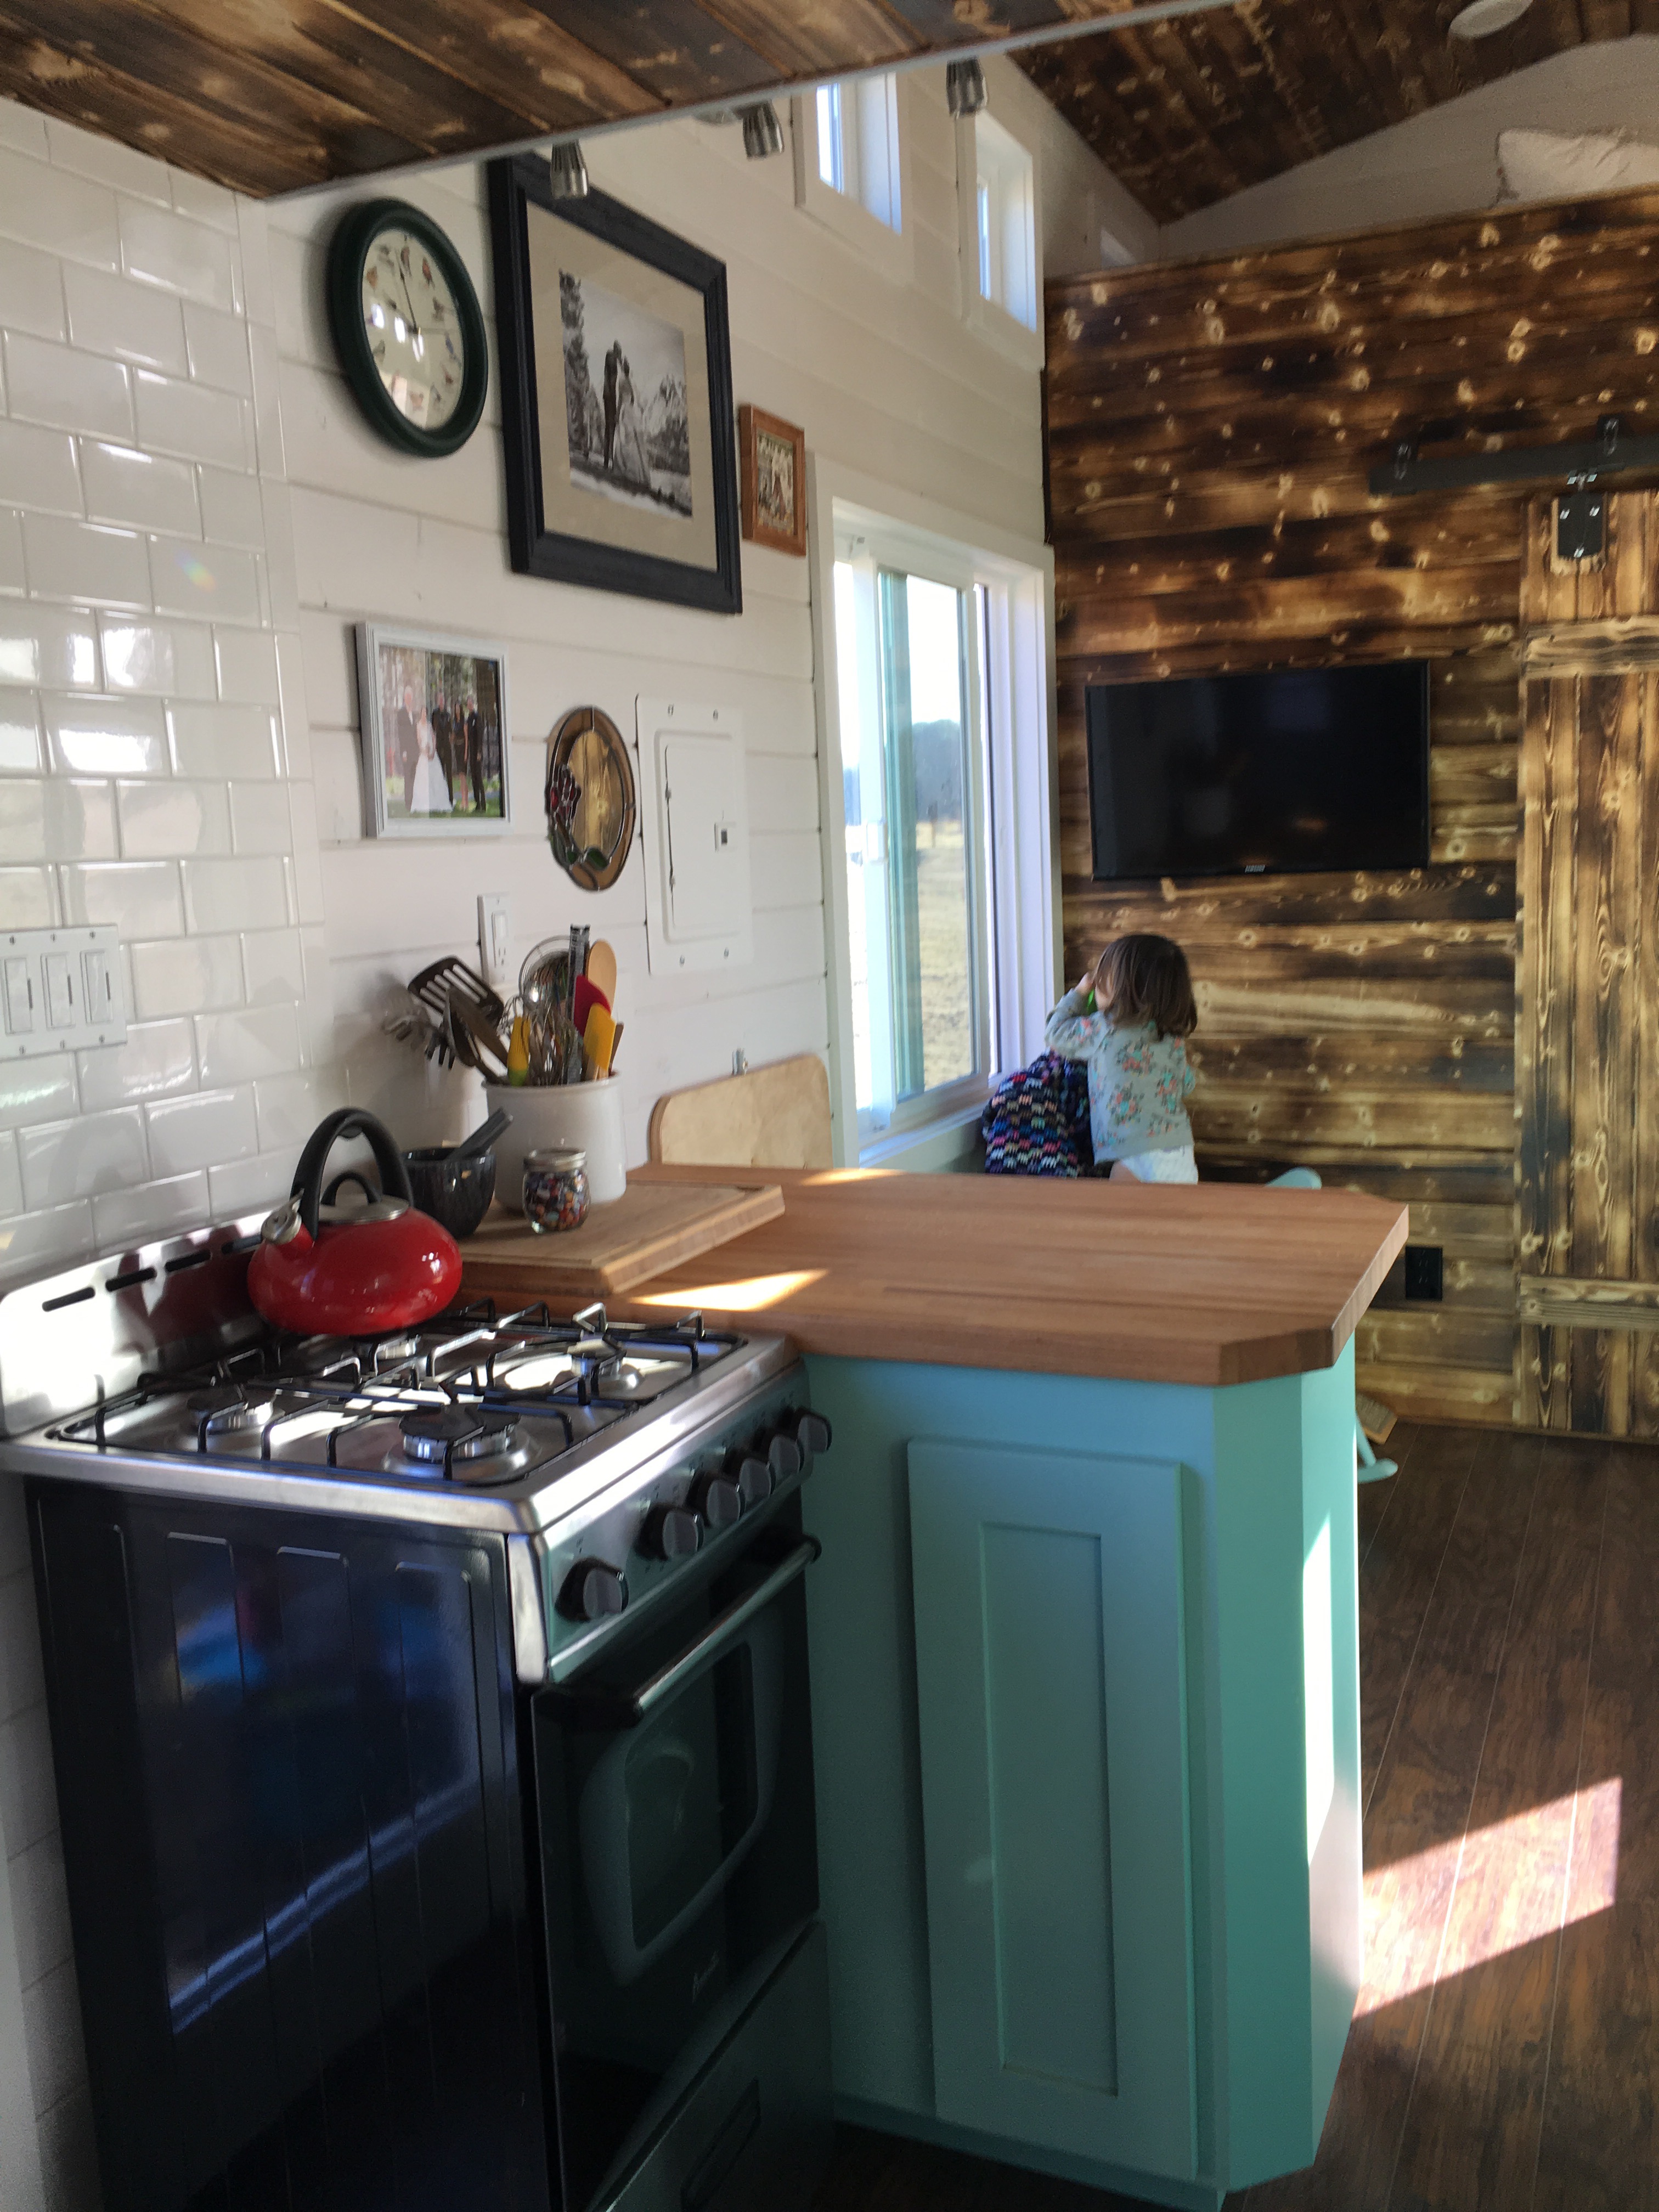
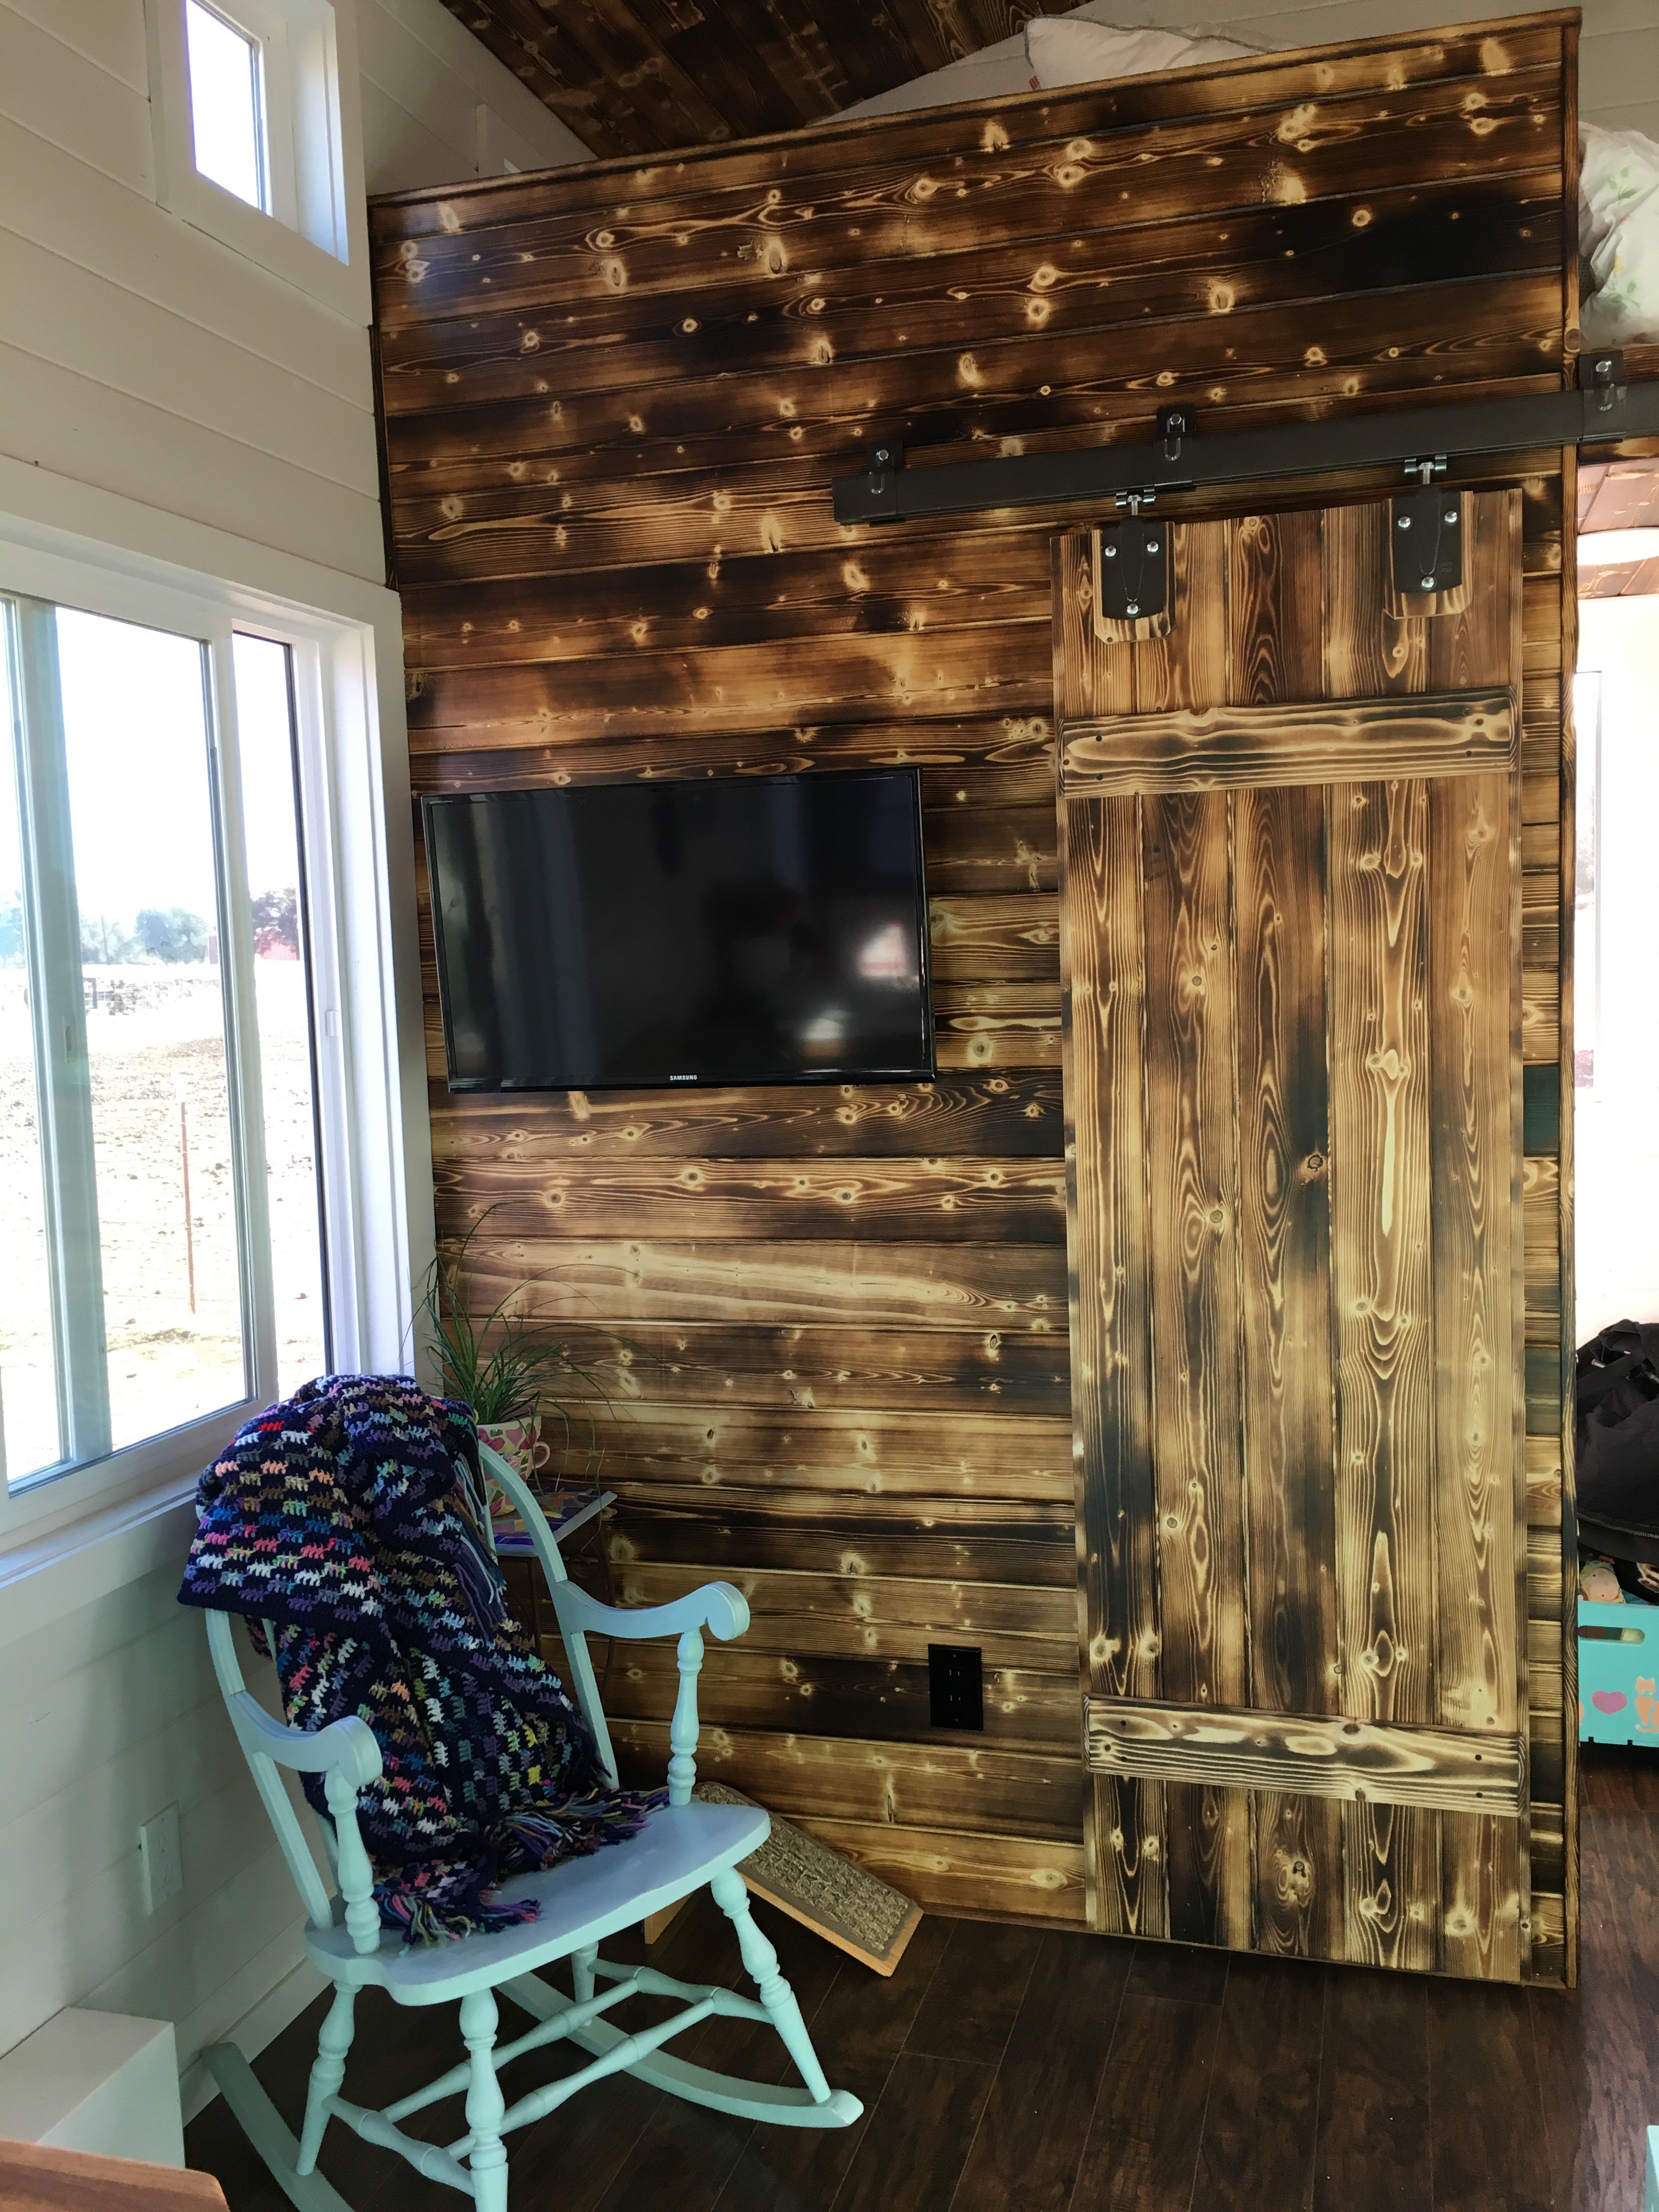
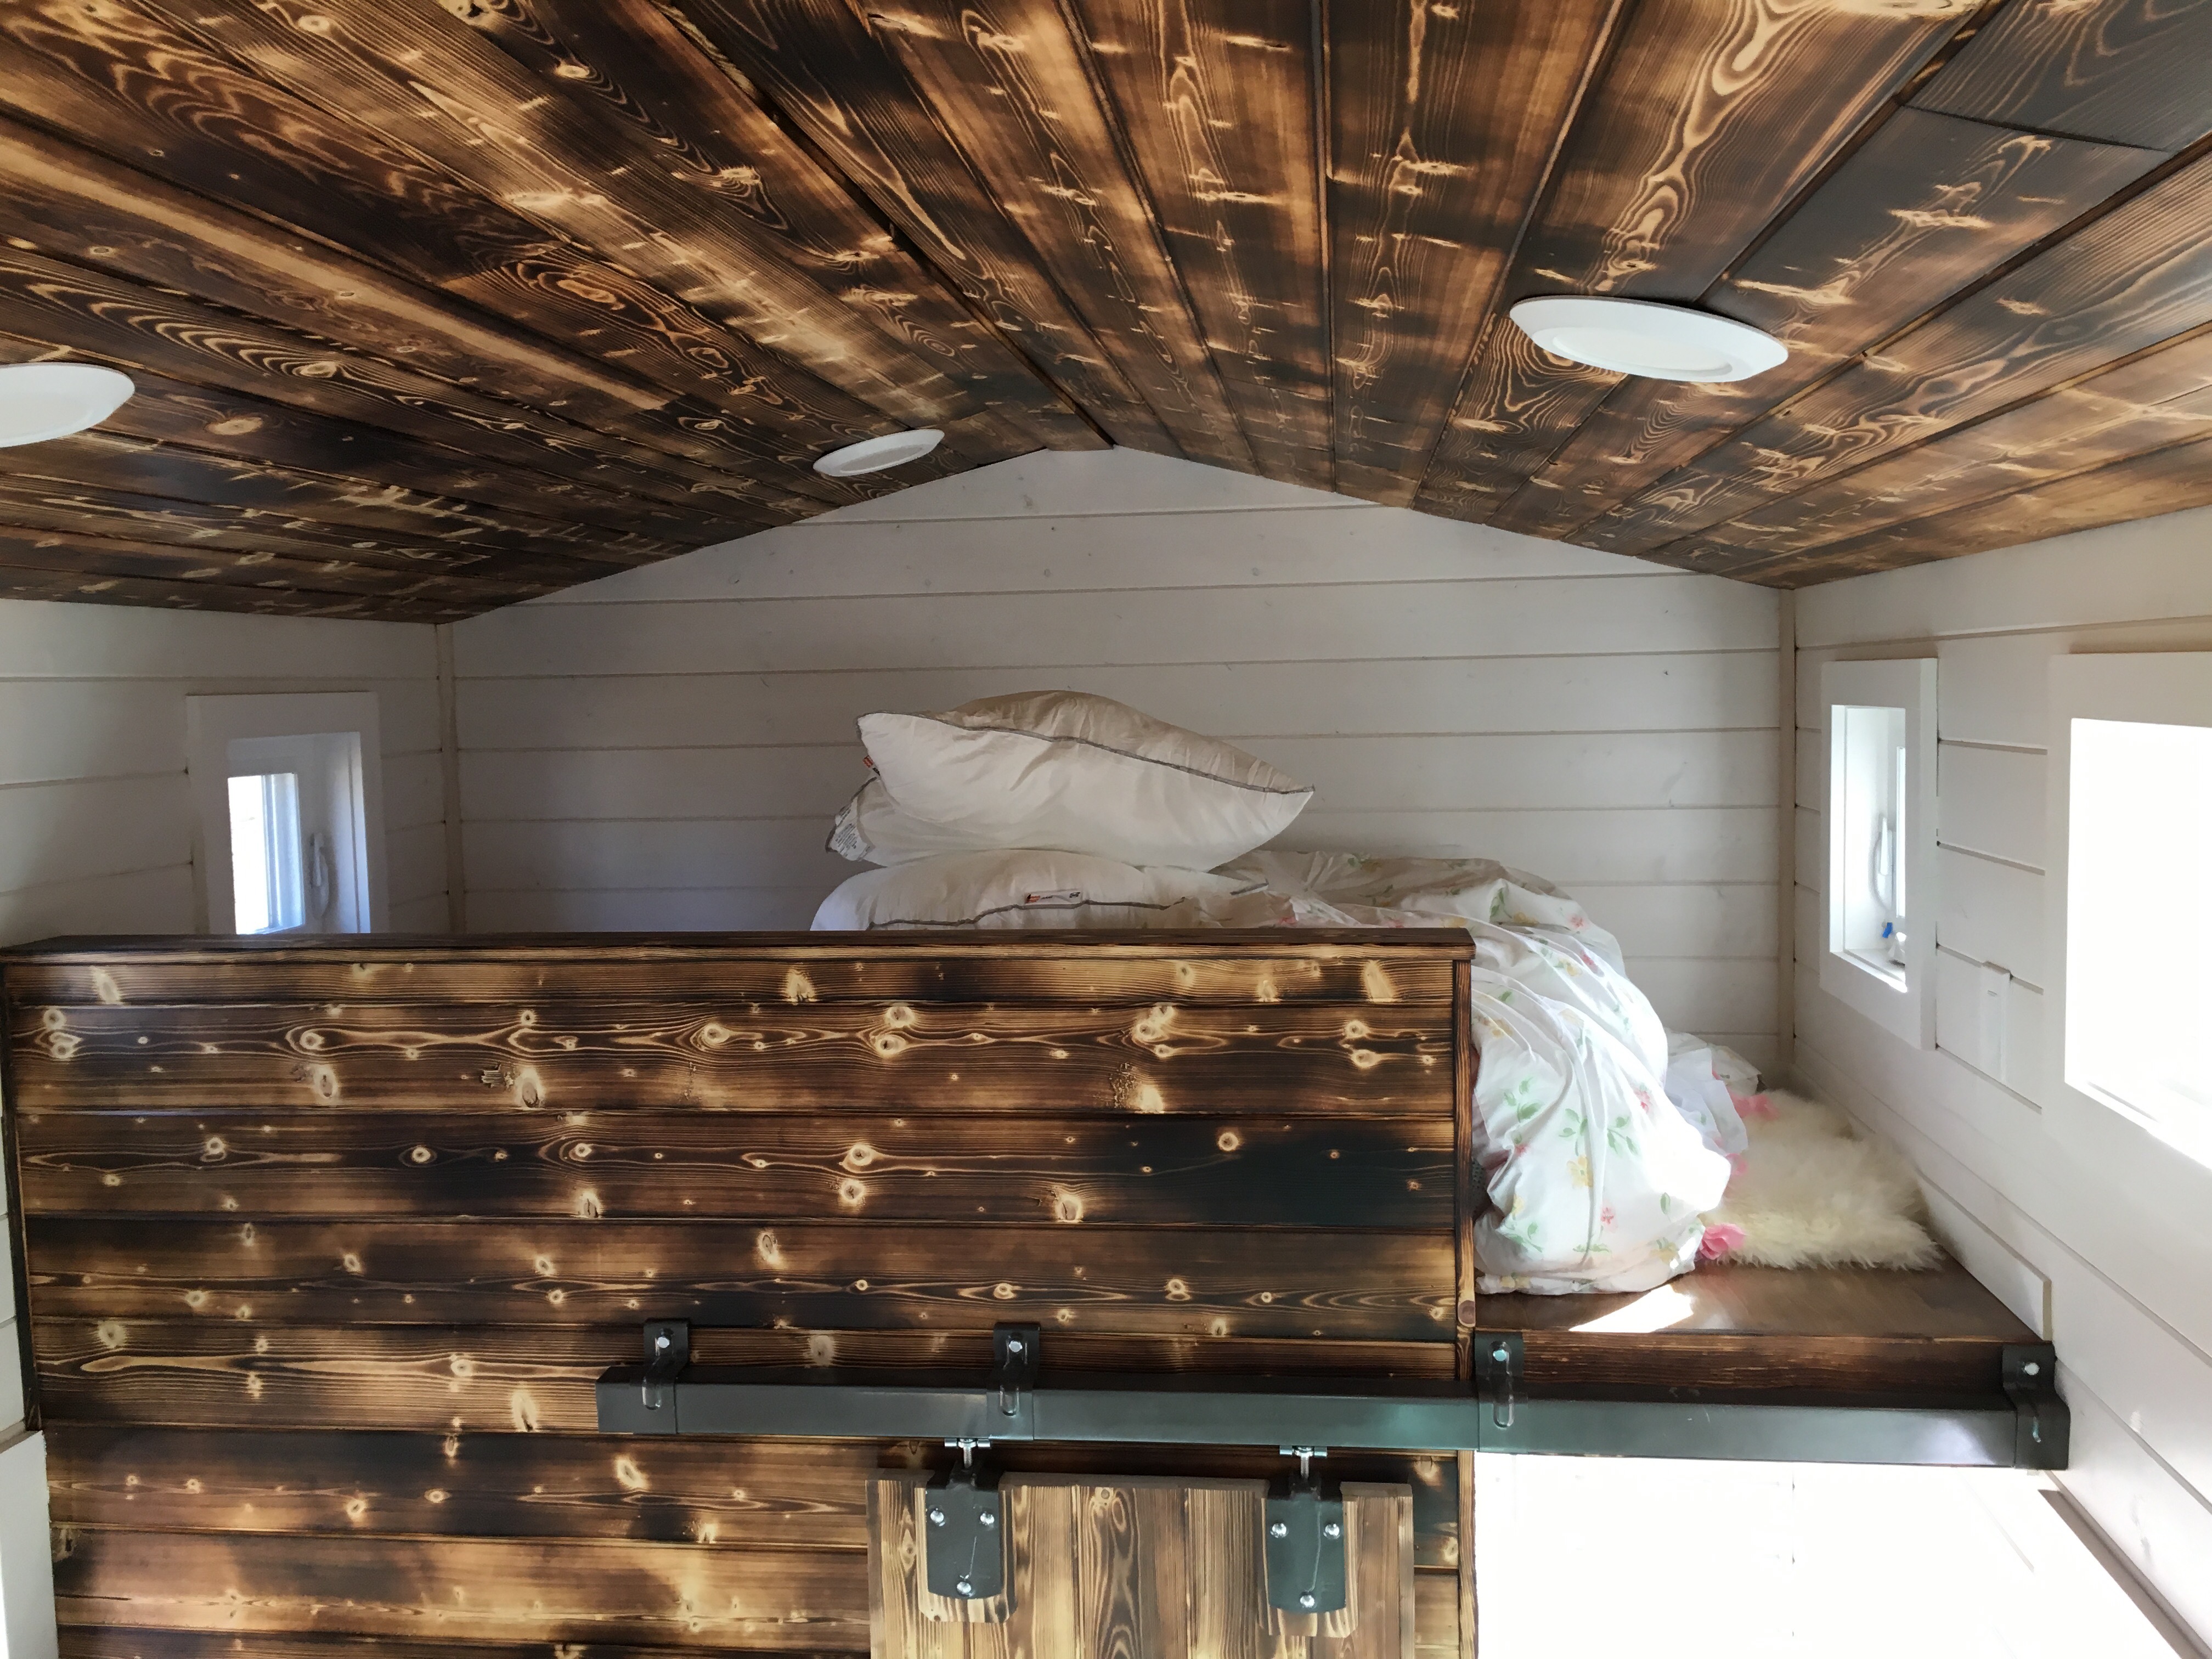
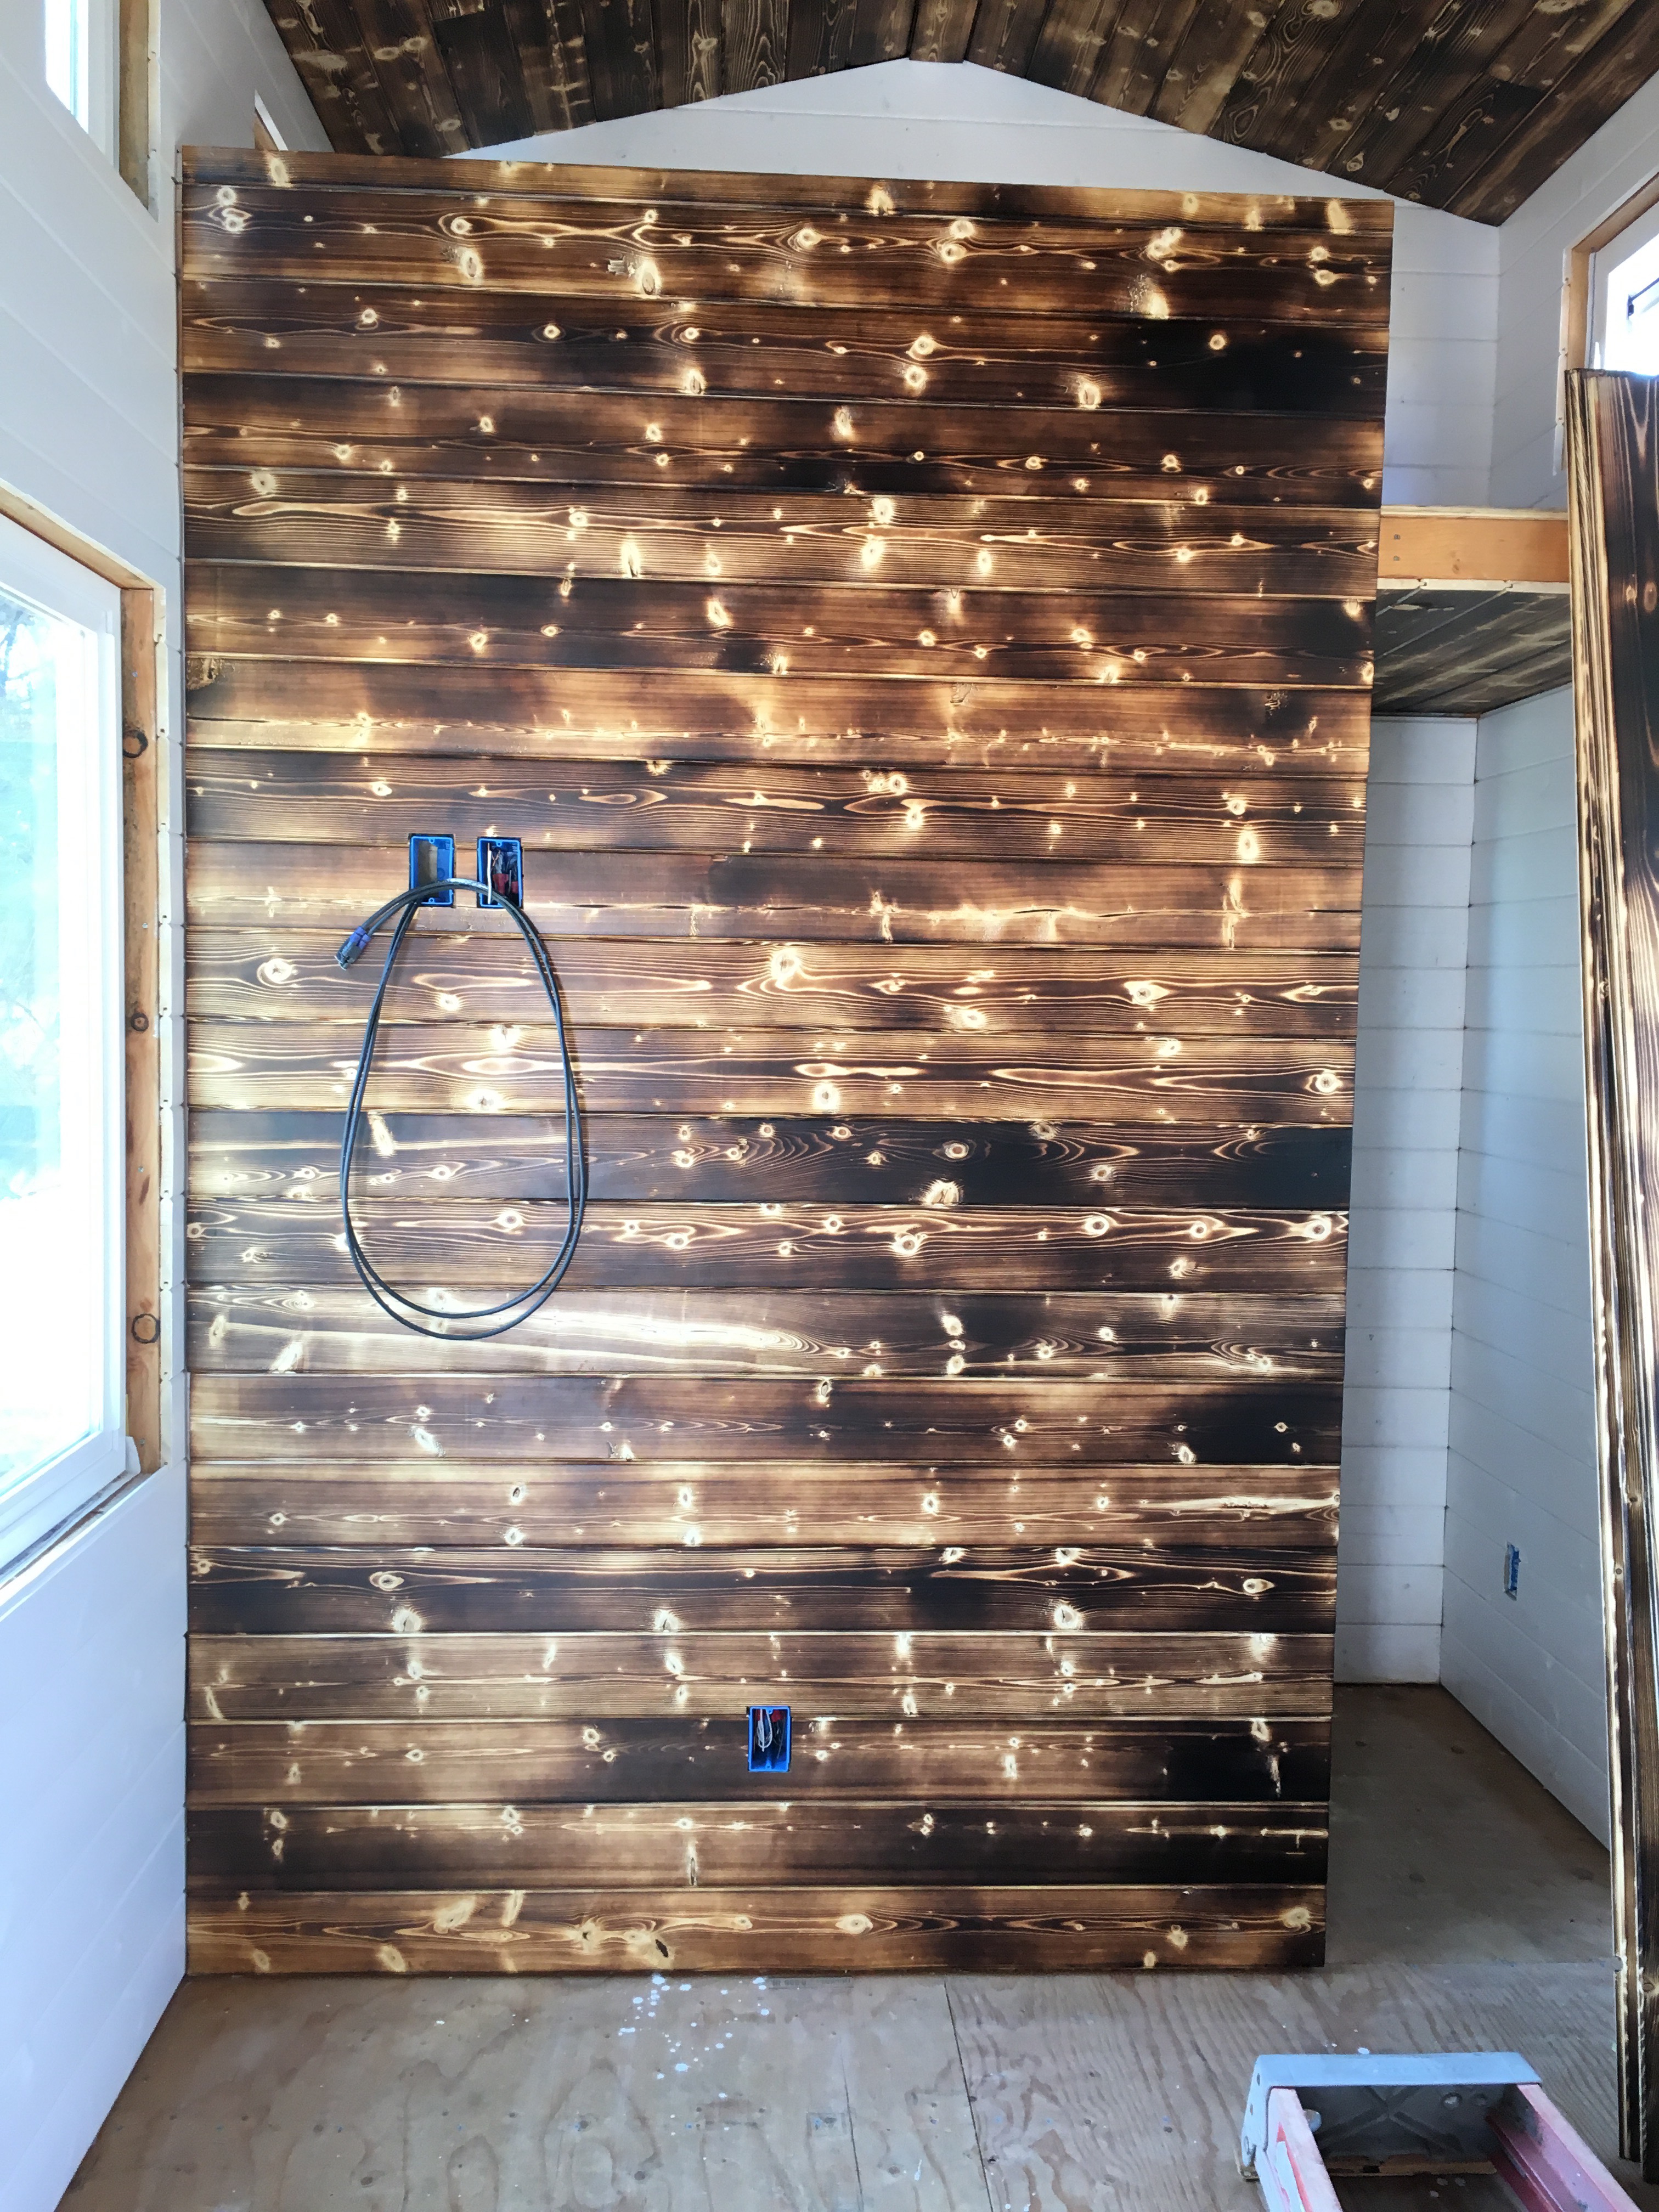
I found a technique called Shousugiban that uses a huge torch to burn the wood and bring out the wood grain. 


We absolutely loved it and wanted to use it for our accent wall and all the ceilings. 

Here’s the accent wall. 

Can you say “gorgeous”?!?!?

Now keep in mind, if you decide to use the Shousugiban technique, you’re playing with fire, so take the appropriate measures to stay safe. J burned on a concrete floor in the shop to avoid starting a fire outside in the dry grass, but he also had a hose and fire extinguisher on stand by just in case.


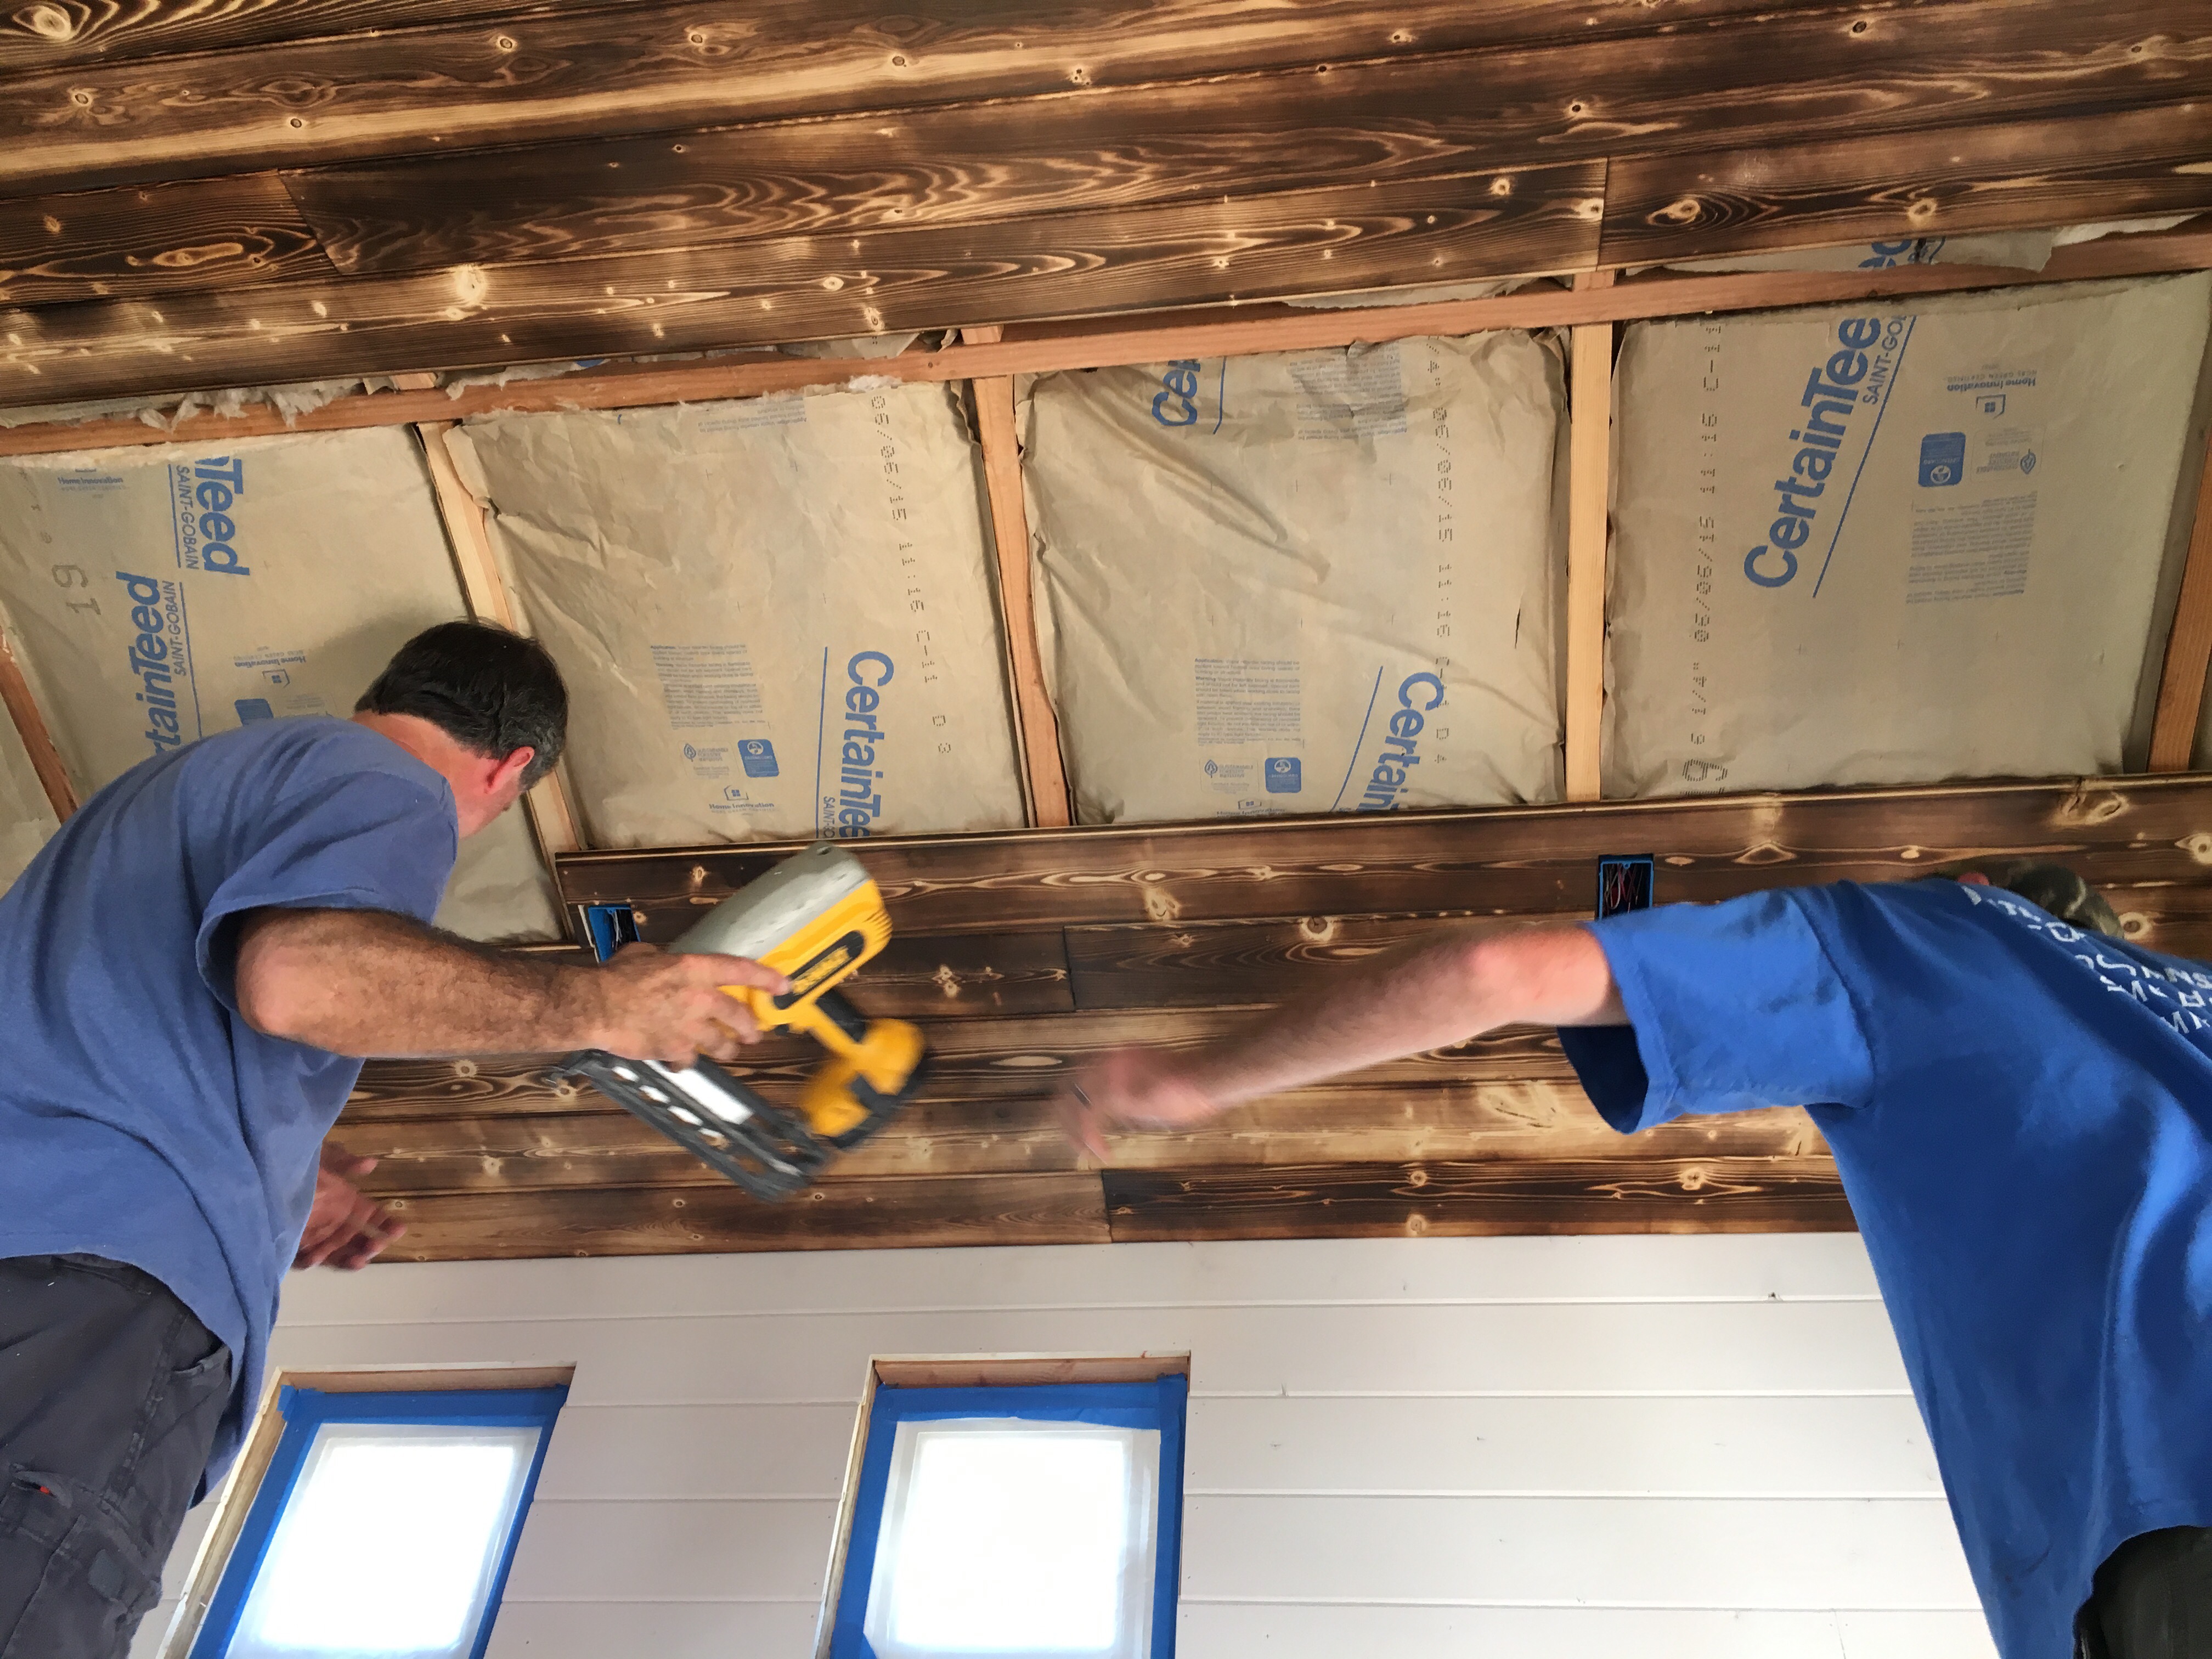
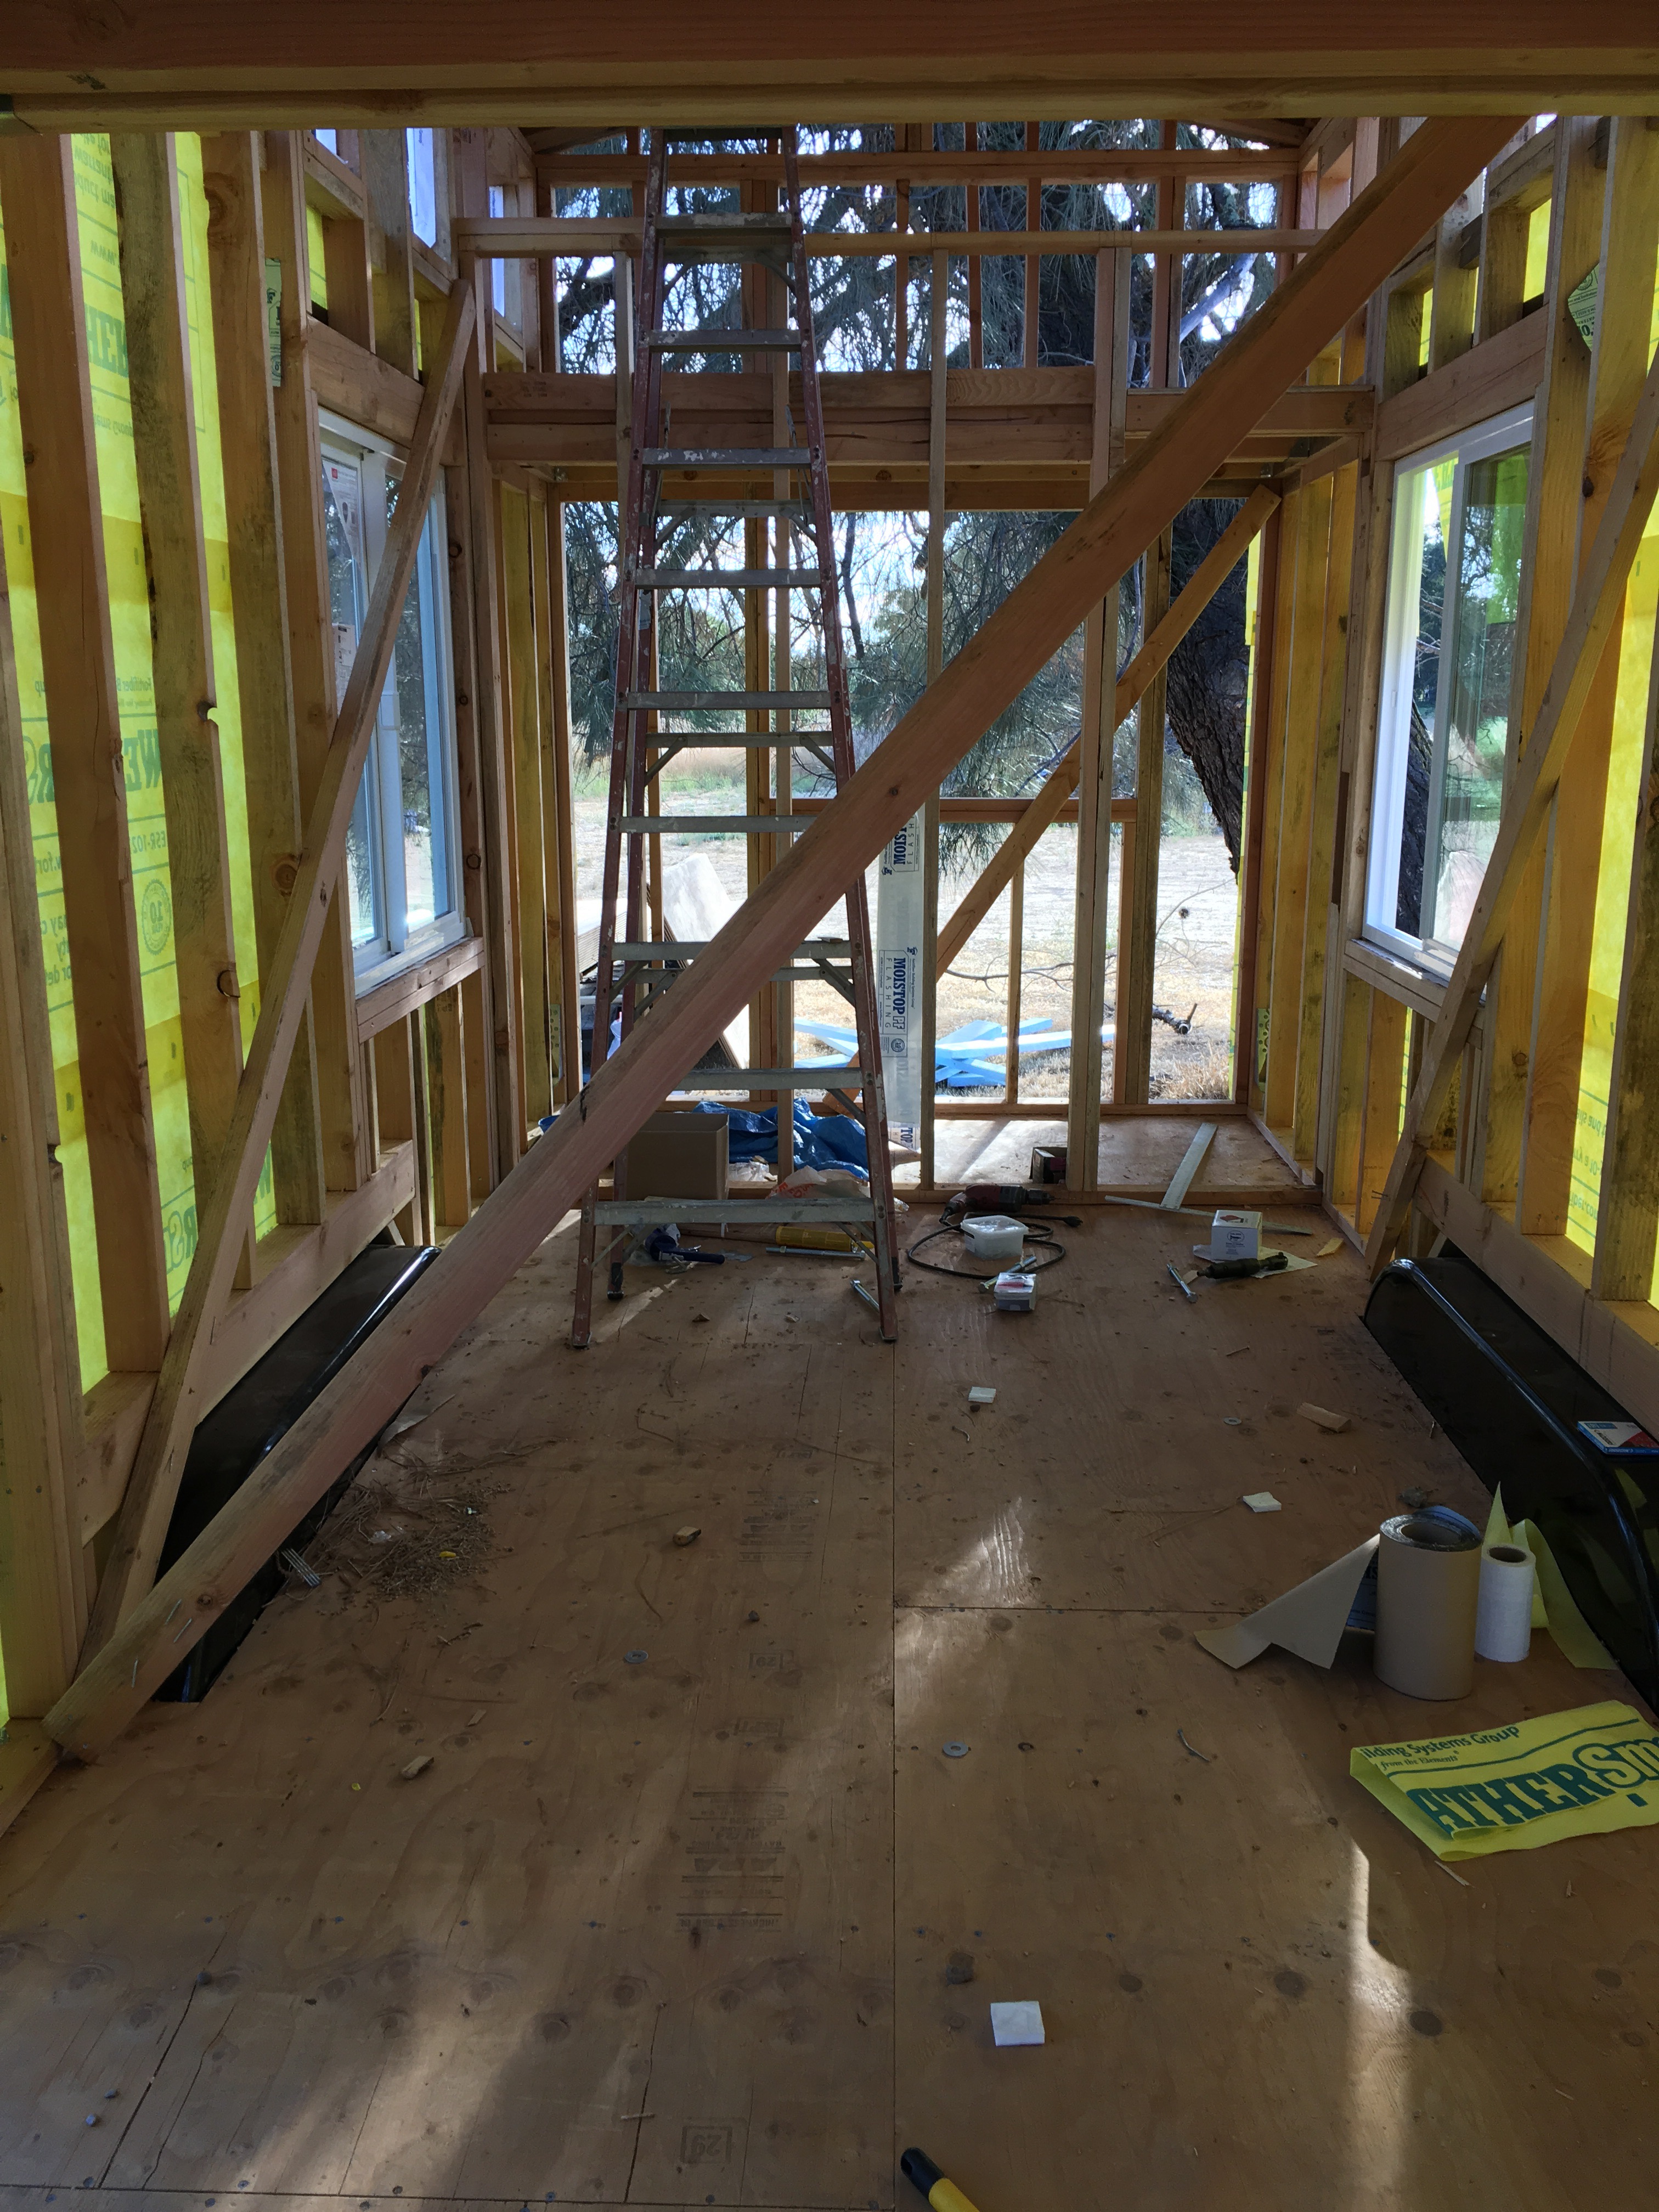
The main ceiling was next. 

To help join the two sides together, J and his dad ran a piece right down the middle. It didn’t stick out very far, so it created an illusion of a false beam of some sort but also gives an impression of a curved roof line, which I really enjoy. 


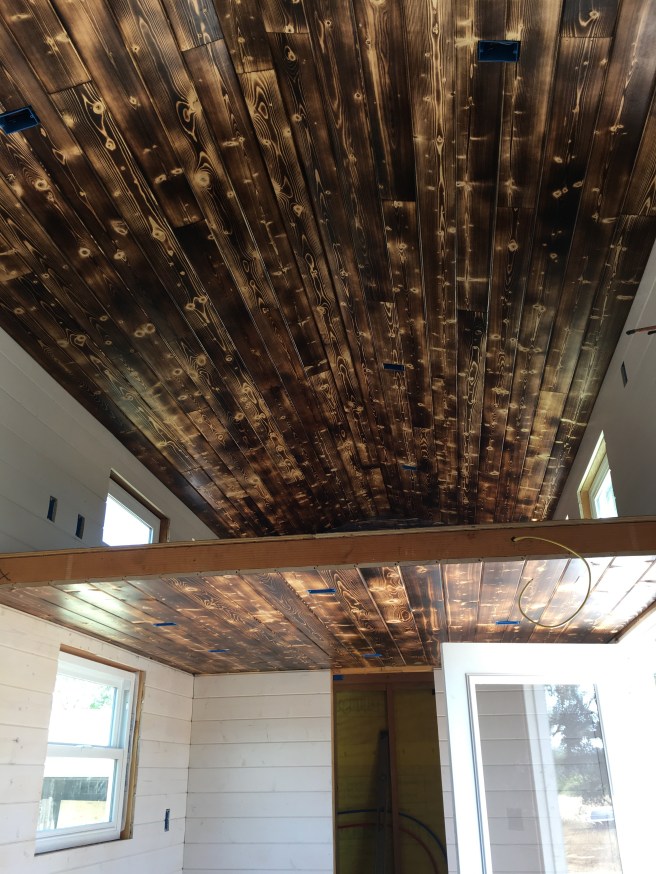
Can you spot the middle? 

After everything was nailed into place and wiped free of soot, J sprayed a clear water-based coat of polyurethane over every wood surface. This will help protect the wood from moisture and (hopefully) make it easy to clean off surprise works of art from little hands. 


I think it makes the wood glow.

What do you think?

Shims and Nails: Exterior Part One

This last week has been full of exterior tiny house projects, but as we are only half way done with the exterior, I decided to split the blog post in two and show you our papering/window installing/sheeting extravaganza. 

We left off with the tiny house being completely framed and roofed (minus the bathroom). 


Sometimes you need a little extra weight to get the job done.

The first thing J did when we picked up the materials for the siding was complete the bathroom wall. 

Next came a mixture of papering, flashing and window installing. 


Nothing gets more exciting than when you start to see something form that you only daydreamed about for months. Seeing the windows go in made the tiny house actually start looking like a tiny house. 


Round and round J goes.

We laid the paper directly on the studs, with the plywood exterior wood sitting on top of that versus plywood, paper then siding because our plywood exterior is acting as both sheer and siding. We went this direction because as we were already maxed out on our trailer width, we didn’t want to go over that amount with the added siding.

Tiny house materials already serving double duty! 


Amazing that in this picture, there will be part of our kitchen, our dining spot, living room, staircase, W’s room and the twin guest loft bed!


Nice view! 

Once the exterior was papered, J had to devise a safe and reliable way to put up the plywood so he could nail it to the studs and make sure it was still level and not suddenly slip.

He took a spare (level) piece of plywood and clamped it so the top edge of that piece was where he wanted the bottom edge of the exterior piece to sit. Now he could rest the plywood on the bottom piece without worrying about slippage while he nailed it in place. 


Once all the bottom plywood was secure, z bar flashing (to help prevent water seepage) was set on the top edge and thinner pieces of plywood were added to the top. Cedar shingles will be (hopefully) nailed into place at the top in the coming weeks, along with the battens for the bottom.


Just a few more pieces to go! 


Once all completed, W and I enjoyed some Popsicles after all the hard supervising! 


Stay tuned for Part Two!

-C

Framing The Tiny House

Saturday morning started bright and early. J’s dad came out both Saturday and Sunday to help frame the tiny house. 


Chalk lines where snapped and windows and door locations were laid out. 

When a toddler supervises the job site, you get a lot of requests for juice refills and summons to play with bubbles. 


Walls are put up. Very carefully. 


Once all the walls are up and secure, the day was just about done and was picked up again on Sunday. 


With the dawn of Sunday comes the rise of the roof.


And the plywood for the roof. 


In the span of 2 days, J and his dad, along with the help of J’s stepdad and brother completed framing the walls, putting in Wren’s bedroom, twin loft and the master loft and framing and sheeting the roof. 

The bathroom will be framed this week because we ran out of material. 


This upcoming week brings siding and windows being installed. Stay tuned!

-C

Flashing, Insulation & Subfloor

We’ve been extremely busy this past week. After we brought the trailer home, we picked up the flashing needed for underneath the trailer and the rigid foam insulation for the floor. 


We chose 16 gauge galvanized steel for the flashing for its sturdiness and inability to rust. There’s no way anything will makes its way through the bottom!

The downside of such sturdy metal means that it was extremely heavy and difficult to install. 


Jacks were needed. It definitely wasn’t a one man kind of job.


Add 100+ degree weather to the mix and that makes for a most unpleasant task. I’m surprised J didn’t come out with a permanent sunburn.

After the flashing was installed, the insulation was cut to size and put in. 

In the four corners of the trailer, J also welded metal plate. Once the frame is put up, he will be adding HD (heavy duty) tiedowns to the four corners to help hold the corners of the tiny house down to the frame.

A bonus to the open bottomed corners means that we can also have access to work on the trailer brake lights if need be. 

A few days after, our lumber was ready for pick up. 


Our first pickup was enough for the subfloor and framing. In a couple weeks, we’ll pick up the lumber for the siding.

Unloading the lumber from the trailer. 

The plywood subfloor was cut to size but before being laid down, all the top metal was cleaned, glue was applied and then the subfloor was put on. 


Next comes screws, lots and lots of screws. 


W helping daddy.


The gap on the right side of the trailer will be filled in once the framing is started.

Until next time.

-C

Trailer Day! 

This morning we got the call that we’ve been patiently waiting the last 8 weeks for. Our trailer was ready!

With W in her car seat and Willie beside her, we hit the road. 


When we arrived at the dealership, J spotted our trailer straightaway. It was sitting so purty, just waiting to be taken home. 


Only a few signatures were needed and we were all set to go. We decided to order 4 stabilizer jacks before we left. They’ll be used in the four corners of the tiny home to help (you guessed it!) stabilize our tiny home once completed. We’ll be picking those up in a few weeks. 


J did fantastic as ever driving home. He’s had a lot of practice towing trailers and boats in the past, so towing our trailer was no big deal. He did mention though that it was the biggest one he’s towed yet!


Let the building commence!


Willie the Road Dog.

Until next time.

-C